
Can You Paint Cabinets Without Sanding?
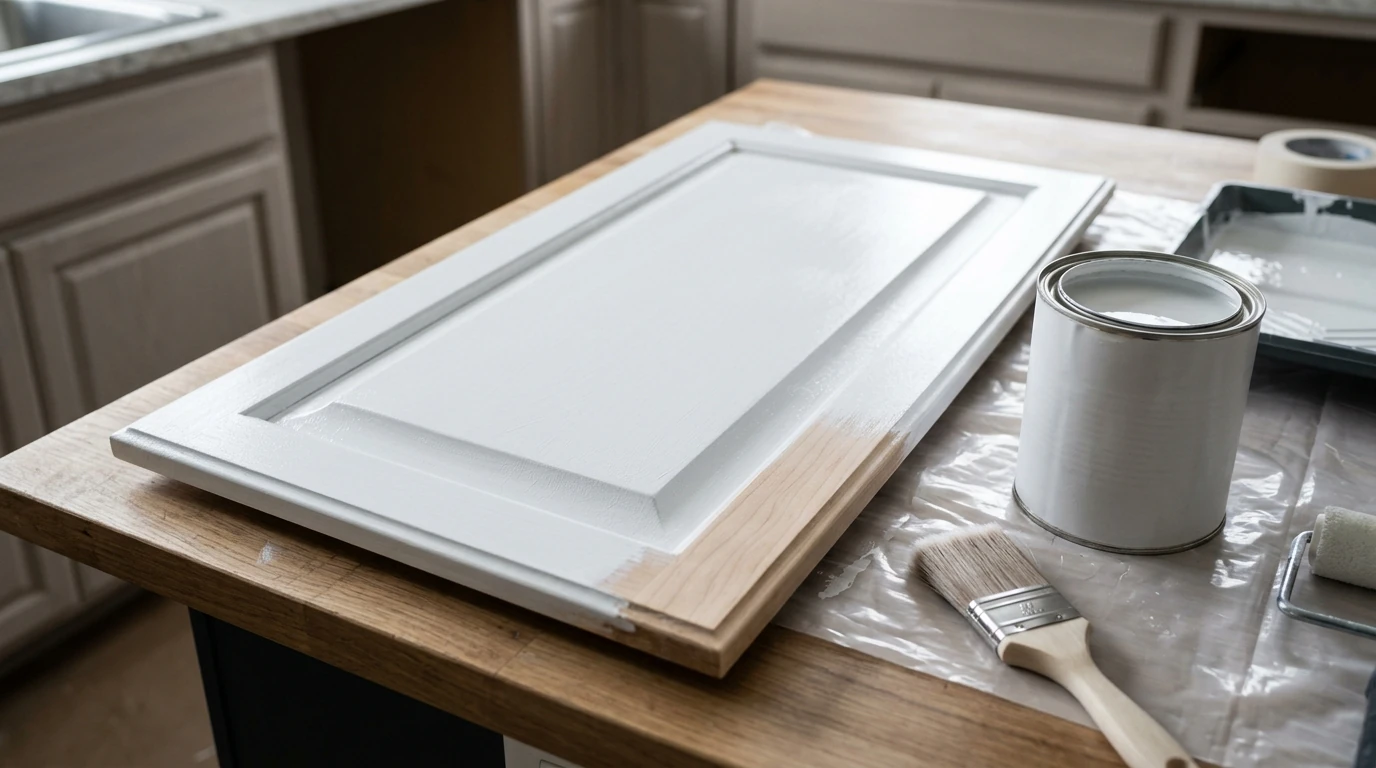
Yes, you can paint cabinets without sanding, and when you follow the right steps the finish holds up beautifully. The no-sand cabinet painting method uses liquid deglosser and bonding primer to handle the adhesion work that sandpaper would normally do. Homeowners in Lakewood, CO love this approach because it cuts out the dust, the mess, and the hours of hand-sanding that can make a cabinet refresh feel overwhelming. That said, it is not a shortcut that skips preparation entirely. You are swapping mechanical prep for a chemical one, and the results depend on choosing the right products and applying them in the right order. Get those two things right and your cabinets will have a hard, durable finish without ever touching a sheet of sandpaper.
Why No-Sand Cabinet Painting Works
Paint sticks because it can grip the surface underneath it. On factory-finished or previously varnished cabinets, the glossy top layer is designed to repel moisture and wear, which unfortunately also means it repels paint. Sanding scuffs that gloss layer and creates tiny ridges the primer can grab onto. Liquid deglosser does the same thing through chemistry instead of abrasion. The solvents in a deglosser dull and open up that surface so bonding primer has something to lock into.
Bonding primer picks up where the deglosser leaves off. Standard primers count on a lightly scuffed surface for grip. Bonding primers are formulated with resins that adhere to slick, glossy, or non-porous surfaces even without that mechanical texture. Together, a deglosser followed by a bonding primer creates a foundation that performs comparably to a lightly sanded surface for most residential kitchen cabinets. This system works reliably on solid wood and MDF. Laminate and thermofoil need a little extra attention, which is covered in the prep section below.
Essential Tools and Materials
Having the right supplies on hand before you start makes the whole project go smoothly. For no-sand cabinet painting, the product choices matter even more than usual because each item carries extra responsibility in the adhesion chain.
- Liquid deglosser, sometimes labeled liquid sandpaper, in a formula suited to your cabinet material.
- High-adhesion bonding primer designed for slick or glossy surfaces, not a standard drywall primer.
- TSP cleaner or a TSP substitute to degrease surfaces before you apply deglosser.
- Lint-free cotton rags or cheesecloth for applying and wiping the deglosser.
- A quality synthetic-bristle brush for frame edges and inside corners.
- A short-nap foam roller for flat door panels to keep brush marks to a minimum.
- Small zip bags and a marker for labeling hardware by door so reassembly is easy.
- Painter's tape and plastic sheeting to protect walls and countertops.
- A water-based alkyd or cabinet-specific topcoat paint for your finish coats.
Step-by-Step No-Sand Cabinet Painting Process
The steps below work for kitchen cabinets with a factory finish, a clear coat, or a previously painted surface that is still in solid condition. Work through them in order. Rushing or skipping any stage is the main reason no-sand projects run into trouble.
Preparing Different Cabinet Materials
Wood cabinets and MDF respond well to the standard deglosser and bonding primer sequence. Start by wiping everything down with TSP cleaner to cut through grease, cooking oil, and any sticky residue. Let the surface dry completely before moving on to deglosser.
Laminate cabinets need a bonding primer that is rated specifically for laminate or melamine. Standard bonding primers often lack the flexibility to stay put on laminate, which moves differently than wood as temperatures shift. Test a small hidden spot first, let it cure for 48 hours, then press a strip of painter's tape firmly onto the primed area and pull it back. If the primer lifts, switch to a product with a melamine-specific rating before continuing.
Thermofoil cabinets carry the most risk in a no-sand scenario. The vinyl film wrapping the cabinet can be softened by strong solvents, especially near seams and edges. Stick with a water-based deglosser on thermofoil and apply it conservatively, keeping away from any edges. If your thermofoil already shows some lifting before you start, a cabinet painting consultation can help you figure out the right path forward.
Deglosser Application Techniques
Pour the deglosser onto a lint-free rag rather than directly onto the cabinet. Work in small sections, roughly two square feet at a time, using overlapping strokes in one direction. Then immediately wipe with a clean dry rag to lift the dissolved residue. Do not let the deglosser pool or sit longer than the manufacturer recommends, which is usually 30 to 60 seconds for most products.
Give the deglosser time to fully dry before you prime. In normal indoor conditions that takes about 15 to 30 minutes. In Lakewood, CO during winter months indoor air tends to be dry, which speeds things up. In summer when indoor humidity is higher, give it the full 30 minutes even if the surface feels dry to the touch. A surface that still has active solvent residue will fight your primer instead of welcoming it.
Primer Selection for Maximum Adhesion
If there is one place to spend your attention on a no-sand cabinet painting project, it is primer selection. The right bonding primer is what separates a finish that lasts from one that starts peeling in a year. Two categories cover most situations.
Shellac-based bonding primers offer strong adhesion to almost any surface and do a great job blocking tannin bleed from wood cabinets. They dry fast, typically within 45 minutes, and work with most topcoat paints. The trade-off is a strong solvent odor and cleanup that requires denatured alcohol, so good ventilation matters.
Water-based acrylic bonding primers have improved a lot and are a practical choice for homeowners who want easier cleanup and lower odor. Look for products labeled specifically for slick or glossy surfaces. General-purpose bonding primers vary widely and not all of them grip cabinetry reliably. Water-based options usually need two to four hours before you can apply your topcoat.
- For raw or stained wood cabinets, a shellac-based bonding primer handles tannin blocking and adhesion in one coat.
- For previously painted cabinets in good condition, a water-based bonding primer rated for glossy surfaces works well.
- For laminate, confirm the label says melamine or plastic-surface rated before you buy.
- For thermofoil, use a water-based formula and always test an inconspicuous spot before going all in.
Apply primer in thin, even coats. Two thin coats will outperform one thick coat every time, both in adhesion and in keeping brush marks off the final surface. Let each coat cure fully per the manufacturer's instructions, not just until it feels dry.
Climate Factors That Affect No-Sand Painting
Interior painting is generally forgiving of outdoor conditions, but cabinet painting is more sensitive to temperature and humidity than most wall work. Both deglosser and bonding primer depend on consistent evaporation rates to do their job properly.
Most bonding primers apply strongest between 50 and 85 degrees Fahrenheit. Below 50 degrees, the primer film forms slowly and adhesion can suffer. Above 85 degrees, primer dries too fast and can leave a rough texture that affects how well the topcoat bonds. In Lakewood, CO, kitchens with west-facing windows can get surprisingly warm on summer afternoons, so painting earlier in the day when surface temperatures are stable is a smart move.
When indoor humidity climbs above 70 percent, drying slows for both water-based deglossers and primers, which raises the risk of sagging on vertical door surfaces. In dry winter air, the opposite happens. Faster drying sounds like a plus, but it can cause primer to skin over before it fully levels, leaving a texture that shows through your topcoat. Keeping indoor humidity around 40 to 50 percent during the project, with a humidifier if needed, gives you consistent results no matter what the weather is doing outside.
Troubleshooting Common No-Sand Painting Problems
If paint starts peeling at door edges or around hardware holes, the likely culprit is incomplete deglosser coverage or a primer that was not suited to the surface. The fix is to strip the affected area back to sound paint, re-apply deglosser, and reprime with the right bonding primer before recoating. It feels like a setback, but it is a straightforward repair.
Brush marks locked into the dried finish usually come from applying topcoat that is too thick, using a stiff brush on water-based paint, or skipping the foam roller on flat door panels. Lightly scuffing the cured surface with 320-grit sandpaper, wiping it clean, and applying a thinner final coat takes care of most brush mark problems without needing to start from scratch.
Sometimes adhesion problems trace back to wax or furniture polish that was applied to the cabinets at some point. Wax is nearly invisible but creates a barrier that neither deglosser nor bonding primer can fully break through. Cleaning with a wax-stripping solvent before you deglosser usually solves it. If adhesion problems keep showing up across your cabinet run despite good prep, a kitchen painting assessment can help identify whether the surface needs a different approach altogether.
Durability Expectations for No-Sand Cabinet Painting
A no-sand cabinet painting project done right, with proper bonding primer and a cabinet-specific topcoat, holds up well in everyday residential use. On wood and MDF cabinets with a sound existing finish, you can expect results that look and feel close to a traditionally sanded job. High-traffic doors around pulls and hinges may show wear a little sooner than they would on a mechanically sanded surface, but for most households that difference does not become visible or noticeable for three to five years.
Where no-sand results can differ more noticeably is in zones with heavy moisture exposure, like the cabinet directly above a range or under a sink. In those spots, a light mechanical scuff with 120-grit sandpaper on just those two or three panels makes a real difference in how long the adhesion holds. You are not signing up for a full sand-and-strip. You are just giving the highest-stress cabinets a little extra grip.
While you have the hardware off, it is also a great time to consider upgrading pulls and hinges. New hardware installed after the topcoat cures avoids the touch-up headaches of painting around existing pieces and tends to keep the whole kitchen looking fresh for years longer.
Why Choose Ace Hardware Painting Services Metro Denver
Cabinet painting projects feel a lot less stressful when you have a crew that knows exactly what your surfaces need before a drop of paint goes on. Ace Hardware Painting Services Metro Denver walks through that prep sequence with care on every project, matching product selection to the specific cabinet material in your home. Our background-checked W-2 crews follow a consistent process so nothing gets rushed or skipped. Every residential project includes color consultation and physical color samples, so you can hold the actual finish up to your kitchen and feel confident before we begin. We use Benjamin Moore paints and primers as our standard because they perform consistently on cabinetry and stand up to daily kitchen life. Our work is backed by a workmanship guarantee, and we stand behind the adhesion and finish quality on every cabinet we paint. When you are ready to move forward, Get an Estimate from Ace Hardware Painting Services Metro Denver and we will help you get your kitchen looking exactly how you want it.
FAQ
What happens if you skip both sanding and deglosser before painting cabinets?
Without any surface preparation, bonding primer cannot grip the existing finish and your topcoat will peel, often within weeks. The glossy factory finish on most cabinets is built to repel moisture and wear, which also means it repels paint. Deglosser is not optional in a no-sand project. It is the step that replaces the mechanical grip that sanding would normally create.
How long should deglosser dry before applying bonding primer?
Most liquid deglossers need 15 to 30 minutes of dry time at room temperature before you prime. Check the label on your specific product, since solvent-based formulas sometimes need a little longer to off-gas. Priming over a surface that still has active deglosser residue is one of the most common reasons no-sand projects end up with adhesion problems.
Can you use the no-sand method on cabinets that were painted before?
Yes, as long as the existing paint is sticking well with no peeling, bubbling, or flaking anywhere. A sound previously painted surface takes the deglosser and bonding primer sequence reliably. If the old paint is already failing in spots, scrape those areas back to a stable layer first, because new paint applied over failing paint will come right off with it.
How many coats of paint do cabinets need after bonding primer?
Two topcoats of a cabinet-specific or water-based alkyd paint is the standard. Apply the first coat thin, let it cure fully per the product instructions, then lightly scuff with 320-grit sandpaper before the second coat. That light scuff between finish coats is not the same as full prep sanding. It just smooths out any texture or dust nibs from the first coat and helps the final coat bond cleanly.
Is no-sand cabinet painting a good option for older cabinets with multiple layers of existing paint?
It depends on how well those layers are holding. If the existing paint is firmly adhered and the build-up is not so thick that it obscures door detail or makes hardware bind, the no-sand method can work. If previous layers feel soft, chalky, or are peeling at seams, those need to be stripped back before any new finish will hold. A quick test near a cabinet hinge, where the surface takes the most stress, will tell you quickly whether the existing paint stack is ready for a new coat.