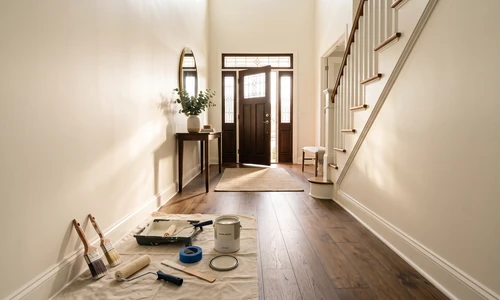
What Does Primer Do for Paint
Primer is one of those materials that shows up on nearly every project materials list, yet its actual purpose often goes unexplained. You apply it, let it dry, and move on to the color coat without fully understanding what just happened at the surface level. That gap matters, because primer is not decorative and its benefits are not cosmetic. It is a preparatory coating that determines how well your topcoat bonds, how long it holds up, and how accurately the final color reads on the wall. This guide covers what primer actually does at a mechanical and chemical level, when you need it, when you can reasonably skip it, and how to choose the right formulation for your surface.
Is paint primer necessary? The honest answer is: it depends on what you are painting and the condition of that surface. Primer is non-negotiable on bare wood, new drywall, unprimed metal, and surfaces with moisture damage or stains. On a clean, well-bonded, same-sheen interior wall where you are staying in the same color family, you can often skip a separate primer coat without consequences. The risk of skipping it rises sharply when any of those conditions change.
If you would rather hand this decision off entirely, residential interior painting handled by Ace Hardware Painting Services includes the surface assessment and primer selection as part of the scope, so nothing gets skipped because a homeowner was unsure about a surface condition. That option is available at any stage, whether you are still planning or halfway through a project that has stalled.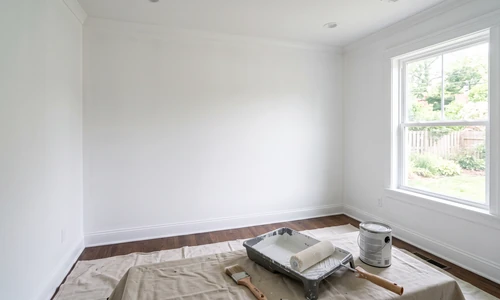
Quick Overview of What Primer Does
- Creates a binding layer between the raw or existing surface and the topcoat paint
- Fills micro-voids in porous surfaces to reduce uneven paint absorption
- Improves adhesion so the topcoat bonds mechanically and chemically rather than just sitting on the surface
- Blocks stains, tannins, water marks, and bleed-through that topcoat paint cannot conceal on its own
- Seals moisture-sensitive substrates like new drywall and bare wood against early paint failure
- Allows true color expression by giving pigment a neutral, stable base to develop on
- Reduces the total number of topcoat layers needed for even coverage
- Extends the service life of the entire paint system by preventing the early failure modes that lead to repainting
Assessing Your Surface Before You Begin
Identifying Surface Type and Condition
The surface you are priming determines the primer formulation you need. New drywall is porous and alkaline, and it absorbs the first coat of paint unevenly without a primer to equalize that porosity. Bare wood contains tannins and natural oils that bleed through water-based topcoats and cause discoloration. Previously painted surfaces in good condition present a different challenge: if the existing coat is glossy, new paint will have little to grip without either scuff sanding or a bonding primer. Surfaces with water stains or smoke damage contain soluble contaminants that migrate straight through standard topcoats. Each scenario calls for a specific response, and applying the wrong primer or no primer at all is what leads to callbacks and reruns.
Pre-Work Checks Before Priming
Before opening a primer can, run through these surface checks. First, confirm the surface is clean, dry, and free of grease, dust, and loose material. Primer bonds to what it contacts; if that layer is contaminated, the bond forms there and fails there. Second, check for existing paint adhesion by pressing a strip of tape firmly to the surface and pulling it back quickly. If paint lifts, the existing coating needs to come off before anything else goes on top. Third, identify any active moisture sources, because primer applied over damp substrate traps moisture and accelerates blistering. Fourth, note any stains, tannin-heavy wood species, or smoke damage that will require a stain-blocking or shellac-based primer rather than a standard PVA product. Getting these checks done before you buy supplies saves a second trip and a second project.
Essential Equipment and Materials for Priming
Applicator Selection: Roller, Brush, or Sprayer
Most residential priming is done with a roller and a cut-in brush, and that combination handles the majority of interior surfaces well. A 3/8-inch nap roller works for smooth to lightly textured drywall. A 1/2-inch nap roller handles heavier texture. For raw wood trim, cabinets, or detailed millwork, a quality synthetic-bristle brush gives you more control over primer penetration into joints and profiles. Airless sprayers are faster on large open areas and are the right call for new construction where an entire house worth of drywall needs to be primed before trim goes in. For a single room refresh, a sprayer introduces more masking and cleanup work than it saves. Rent one if you are doing a full interior repaint from bare; brush and roll if you are doing selective repairs or a room or two.
Choosing the Right Primer Formulation
Primer formulations are not interchangeable. PVA drywall primer is purpose-built for new drywall and skim-coated surfaces; it seals the paper face and joint compound uniformly so the topcoat reads at the same sheen across the entire wall. Oil-based primer is the standard choice for bare, resinous, or tannin-heavy wood species like cedar, redwood, and knotty pine, because water-based products will reactivate those tannins and push them through to the surface. Shellac-based primer is the highest-performance stain blocker available; it stops nicotine, heavy water stains, and marker bleed-through that water-based stain blockers sometimes cannot. Bonding primer is formulated with higher-adhesion resins for surfaces that resist mechanical adhesion: glossy existing paint, tile, glass, and certain plastics. Rust-inhibiting primer belongs on bare metal to prevent oxidation under the topcoat. Matching the primer to the surface is the whole job. When the topcoat is a premium Benjamin Moore waterborne finish, which Ace Hardware Painting Services uses as standard, a compatible water-based primer on properly prepared surfaces delivers maximum adhesion and color accuracy.
Other Materials You Will Need
- Drop cloths and painter's tape
- Sandpaper (120-grit for light scuffing glossy surfaces, 80-grit for bare wood prep)
- Tack cloth or vacuum with brush attachment for dust removal after sanding
- Putty knife and spackle or joint compound for filling voids before priming
- Paint tray and liners
- Stir sticks and a can opener
- Clean water (water-based primer) or mineral spirits (oil-based primer) for cleanup and brush conditioning
- Respirator rated for VOCs if using oil-based or shellac primer in an enclosed space
If sorting out the right primer type for a multi-room project or a surface with a complicated history feels like the part where the project could go sideways, your local Ace Hardware Painting Services office can scope the work and handle surface prep as part of the job. Get an Estimate before committing to materials on a larger project.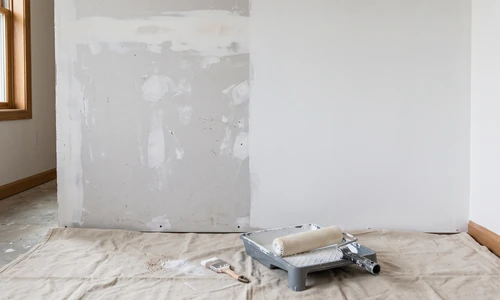
Step-by-Step Priming Process
Step 1: Clean and Repair the Surface
Adhesion begins at the surface itself, and primer cannot compensate for contamination or damage underneath it. Wash walls with a mild TSP-substitute solution to remove grease, cooking residue, and hand oils. Let the surface dry completely before proceeding. Fill holes, cracks, and surface voids with spackling compound or joint compound, feather the edges flat, and let the filler cure fully. Sand the repairs smooth with 120-grit sandpaper and vacuum or tack-cloth the dust. On bare wood, sand with the grain using 80-grit to open the surface and give the primer mechanical tooth to grip. Do not skip the cleaning step on surfaces that look clean; surfaces in kitchens and bathrooms carry invisible grease films that prevent primer adhesion even when they appear dry and clean to the eye.
Step 2: Mask and Protect Adjacent Surfaces
Tape off trim, outlets, switch plates, and any surfaces where primer overspray or roller splatter would land. Primer is harder to remove from trim once dry than you expect. Lay drop cloths on flooring and over furniture. If you are spraying primer, mask everything within several feet of the spray path and cover flooring entirely, because spray mist travels farther than brush or roller spatter.
Step 3: Apply Primer at the Correct Film Thickness
Surface porosity is the variable that controls how many primer coats a substrate needs. New drywall typically requires one full coat of PVA primer applied with a roller, followed by inspection after drying. If the joint compound repairs and the drywall face still show different sheen levels after the first coat, a second coat over the repair spots equalizes the surface before topcoat. On bare wood with high tannin content, apply one coat of oil-based or shellac primer, let it cure fully, then lightly sand with 180-grit before topcoat. Over glossy existing paint, apply one coat of bonding primer after scuff-sanding with 120-grit. Do not apply primer too thickly in a single pass; heavy application leads to sagging, slow dry times, and incomplete curing. Two thin coats are always better than one thick coat.
Step 4: Respect the Recoat Window
The recoat window is the range of time after primer application during which a topcoat will bond correctly to the primer film. The lower end (typically 1 to 4 hours for water-based primers, 8 to 24 hours for oil-based primers under normal conditions) exists because primer needs to cure sufficiently for the topcoat to bond to a stable film rather than a wet or semi-wet surface. Applying topcoat too early can trap solvents in the primer layer and create adhesion problems or off-gassing that pushes the topcoat away from the surface. The upper end of the window (typically no more than 2 weeks for most products) matters because primer left exposed too long accumulates dust and surface contamination that reduces topcoat adhesion. If a primed surface sits past the manufacturer's recommended recoat window, light sanding and a wipe-down before topcoating restores mechanical adhesion. Check the specific product data sheet for the primer you are using, because these windows vary by formulation.
Step 5: Inspect the Primed Surface Before Topcoating
Before applying any topcoat, examine the primed surface under raking light (a work light held at a sharp angle to the wall). Raking light reveals surface imperfections, ridges, and holidays (missed spots) that will telegraph through the topcoat. Touch up bare spots with additional primer and address any raised texture or roller stipple with light sanding. This step takes fifteen minutes and saves you from discovering problems after the topcoat is on and fully cured.
Choosing the Right Primer for Your Specific Application
Matching Primer to Surface Condition and Topcoat
The right primer depends on three intersecting factors: substrate material, surface condition, and the topcoat you plan to use. For standard interior drywall in good condition, PVA primer is the correct and most economical choice. For wood surfaces in contact with moisture, such as bathroom trim or exterior wood, an oil-based or alkyd-modified primer resists moisture migration better than water-based products. For surfaces with existing stain problems, shellac-based products deliver complete stain block that water-based stain blockers sometimes fail at on heavy nicotine or tannin bleed. If your topcoat is a water-based enamel, use a water-based primer on compatible surfaces to avoid adhesion incompatibility between oil and water-based films. On surfaces where you are making a significant color shift from dark to light, a tinted primer in a mid-tone close to the topcoat color reduces the number of topcoat layers needed to achieve full, even coverage. This is not about hiding the color with primer; it is about giving the topcoat's pigment load a sympathetic base to develop on instead of a contrasting dark ground.
Curing and Aftercare
Primer film cure and primer dry time are different things. A water-based primer may feel dry to the touch in 30 to 60 minutes but may not reach full film hardness for several hours. Applying a topcoat before the primer fully cures can reactivate the primer surface and intermix the two layers, compromising adhesion and sheen uniformity. In high-humidity conditions, add 50 percent to the dry time listed on the product data sheet. Cold temperatures (below 50 degrees Fahrenheit) slow cure significantly for water-based products and can prevent proper film formation entirely. Oil-based and alkyd primers are less sensitive to temperature but require adequate ventilation to cure correctly and to manage solvent off-gassing safely.
Special Considerations for Challenging Surfaces
Several surface conditions require primer strategies that go beyond the standard application approach.
Skim-coated or veneer-plastered walls have a thin, highly absorptive finish layer that behaves differently from standard drywall. PVA primer is still the right product, but application rate and coverage need to match the specific product's recommendation for plaster surfaces; standard drywall PVA application rates are often too thin for plaster.
Surfaces with active efflorescence or mineral staining, common on below-grade masonry or concrete block, need a masonry block-filler or a masonry primer before any standard primer or topcoat goes on. Painting over efflorescence without addressing the mineral salts causes the salts to push the coating off the surface from behind.
Previously painted surfaces with lead paint require a specific primer and topcoat strategy. Encapsulating lead paint is a valid approach in most jurisdictions, but confirm current local regulations before treating rather than removing lead-painted substrate. Do not sand lead paint without respiratory protection and containment.
Glossy factory-finished surfaces, including pre-finished trim and furniture, need either mechanical scuff-sanding down to at least 80 percent of the surface area or a dedicated bonding primer. Without one of those two steps, paint applied to a factory gloss finish will peel in sheets within months.
When a surface condition falls outside the standard playbook, professional assessment prevents a costly redo. Interior painting services from Ace Hardware Painting Services include surface evaluation as part of the prep phase, so unusual substrates get handled with the right product the first time.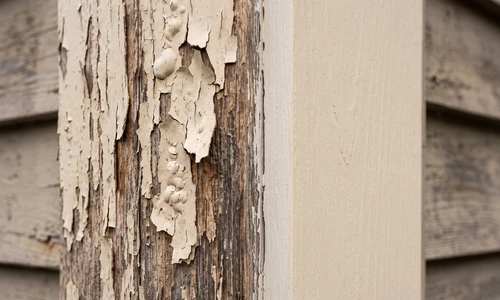
Maintenance and Long-Term Care After Priming and Painting
A properly primed and painted surface requires minimal maintenance to hold up over its full service life. The primer layer is what allows the topcoat to flex with the substrate through temperature and humidity cycles without cracking or peeling, so surfaces that were correctly primed are genuinely easier to maintain than surfaces where primer was skipped.
- Clean painted walls with a mild soap and water solution using a soft sponge; avoid abrasive scrubbers that cut through the topcoat and expose primer
- Address any chips, scratches, or small areas of topcoat damage quickly with touch-up paint; exposed primer that sits open for extended periods absorbs moisture and staining more aggressively than the finished topcoat
- Watch for staining at trim seams, window sills, and areas prone to condensation; early staining on these spots often signals that primer was not applied or that a non-stain-blocking product was used where one was needed
- In high-humidity rooms like bathrooms and laundry rooms, inspect the paint film annually for bubbling or peeling at corners and lower wall sections; these are the first signs that moisture is working behind the film
- Touch-up repaints over previously primed surfaces in good condition can typically be done with topcoat only if the existing film is well-bonded and the color change is modest; a full repaint with fresh primer is the right call when the existing film shows widespread adhesion loss or sheen inconsistency
Things to Consider Before You Start
Before you buy primer and start rolling, answer these questions honestly.
- Do you know what the existing surface is made of and what is currently on it? If you cannot identify whether the substrate is drywall, plaster, previously painted wood, or a specialty finish, you cannot confidently select a primer. Pull tape, scratch-test, and look at the history of the room before you buy anything.
- Is there any visible staining, water damage, or odor? If yes, a standard PVA primer will not handle it. Stain-blocking or shellac primer is necessary, and you need to resolve the moisture source before priming over any water damage.
- Are you making a significant color change? Dark-to-light shifts require tinted primer and often more topcoat layers than homeowners plan for. Build that into your timeline and material estimate.
- Do you have adequate ventilation and PPE for the primer type? Oil-based and shellac primers require respiratory protection and significant ventilation. Water-based primers are lower risk but still need airflow during application and cure.
- How large is the project? A single accent wall is manageable solo. A full house interior with multiple substrates, surface repairs, and color changes is a multi-day project with significant prep complexity. The scope should match your available time and technical confidence.
If any of these questions surfaces uncertainty rather than a clear answer, that is useful information. It tells you where the project risk sits and helps you decide whether DIY is the right path for this particular job.
Why Homeowners Bring in Ace Hardware Painting Services
Some painting projects are well within reach for a motivated homeowner. Others have surface conditions, scale, or primer complexity that makes professional handling the more practical choice. Here is why homeowners work with Ace Hardware Painting Services for interior painting projects.
- Premium Benjamin Moore paints and stains are used as standard on every project, with primer selection matched to the specific substrate and topcoat to ensure system compatibility from the first coat to the last.
- Color consultation and color samples are included, so you are not committing to a full room or full interior based on a paint chip under store lighting.
- Surface assessment is part of the prep phase, not an afterthought. Unusual substrates, stain conditions, and adhesion risks get identified before primer goes on, not after the topcoat reveals a problem.
- A strong workmanship guarantee backs the finished work, so if something does not hold up the way it should, it gets addressed without a separate negotiation.
- No sprayer, roller frame, extension poles, or specialty applicators to source, learn, rent, and return. The crew arrives with the right equipment for the job.
- Background-checked professional crews handle the work, keeping the job on a predictable weekday timeline that does not stretch across multiple weekends.
- Cleanup is included. Drop cloths, tape, primer cans, and rollers are cleared on the way out. You come home to a finished room, not a mid-project workspace.
- The Ace Hardware name carries service standards that homeowners have trusted at retail for decades. That same standard of reliability extends into the painting service.
If this project is moving toward the professional column, your local Ace Hardware Painting Services office is the right starting point. Call Today to schedule an estimate and get a clear scope of what the project requires.
Frequently Asked Questions
What does primer actually do for paint?
Primer is a preparatory coating that creates a stable binding layer between the substrate and the topcoat. It fills surface porosity so paint absorbs evenly, improves mechanical and chemical adhesion so the topcoat bonds correctly, blocks stains and tannins that would otherwise bleed through, and extends the durability of the entire paint system by preventing the failure modes that cause peeling, blistering, and uneven finish.
What happens if you paint without primer?
Skipping primer on a surface that needs it leads to predictable failure modes. On bare or porous surfaces, paint absorbs unevenly and the finished surface shows patchy sheen and inconsistent color. On surfaces with stains or tannins, those contaminants bleed through the topcoat within days or weeks. On glossy existing surfaces, the topcoat peels because it has no mechanical surface to grip. On moisture-exposed surfaces, paint blisters as trapped moisture escapes through the film. The failure mode depends on the surface, but skipping primer on the wrong surface always costs more in time and material to fix than the primer would have cost.
Do you need primer when painting over existing paint?
Not always. If the existing painted surface is clean, well-bonded, in good condition, and you are staying in roughly the same color family with a compatible topcoat, you can often paint directly over it without a separate primer coat. You do need primer over existing paint when the existing surface is glossy, when there are stains or water damage showing through, when you are making a significant dark-to-light color change, or when the existing coating shows any adhesion problems like peeling or chalking.
What is the difference between PVA, bonding, and stain-blocking primer?
PVA primer is formulated for new drywall and skim-coated surfaces; it seals the paper face and equalizes porosity. Bonding primer uses a higher-adhesion resin system and is designed for hard, non-porous, or glossy surfaces where standard primers cannot get mechanical grip. Stain-blocking primer contains pigments or shellac resins that chemically neutralize stains, tannins, smoke, and water marks so they cannot migrate through to the topcoat. Each product solves a different problem, and using the wrong one for the surface condition produces the same result as using none at all.
Can you use paint and primer in one instead of separate coats?
Paint-and-primer-in-one products work on previously painted interior walls in good condition where conditions are already favorable for topcoat adhesion. They do not replace a dedicated primer on bare drywall, bare wood, stained surfaces, or any substrate with an adhesion challenge. The combined product adds a degree of adhesion improvement over straight topcoat, but the primer component is less concentrated than a dedicated primer formula. Use them for maintenance repaints over sound existing finishes; use dedicated primers for new surfaces, problem surfaces, and anything with a surface condition that calls for targeted correction.
How long should primer dry before painting?
Water-based primers are typically recoatable in 1 to 4 hours under normal conditions (65 to 75 degrees Fahrenheit, 40 to 60 percent relative humidity). Oil-based and alkyd primers typically require 8 to 24 hours. Always check the product data sheet for the specific primer you are using, because formulations vary. In high humidity or low temperatures, add significant time to any manufacturer estimate. The upper limit on the recoat window is typically 2 weeks for most products; surfaces primed longer than that should be lightly sanded and wiped down before topcoating to restore adhesion.