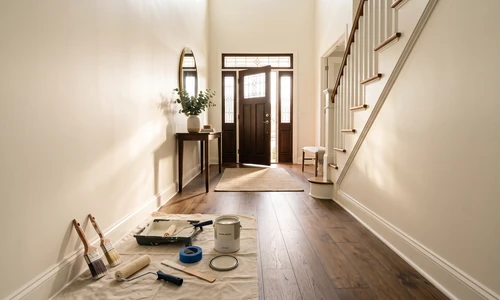
What Happens If Walls Are Not Properly Prepared Before Painting?
Paint failure rarely comes from bad luck. It comes from skipped steps. When walls go straight from bare drywall or a scuffed old paint job to a fresh coat with no cleaning, sanding, or priming in between, the new paint has nothing stable to hold onto. This guide walks through exactly what happens when wall prep gets skipped, how to spot the warning signs before or during a paint job, and how each wall type fails differently when prep is rushed.
What happens if walls are not prepared before painting? Paint applied to an unprepared wall will very likely fail through peeling, cracking, uneven coverage, or stain bleed-through, sometimes within weeks. Dust, grease, moisture, and loose old paint all block the new coat from bonding to the actual wall surface underneath.
Some of these failures show up fast and some take months to surface, which is part of why prep gets skipped in the first place. It looks fine on day one. For homeowners who want to skip the guesswork entirely, professional drywall repair and painting services handle the repair, cleaning, and priming stages as a matter of course, at any point in a project, whether the walls are bare or already showing early trouble.
Quick Overview of What Happens When Walls Aren't Prepared
The failure cascade generally follows a predictable order. Here is what tends to happen, and roughly when:
- Hours to days: Paint applied over dust or sanding residue looks uneven right away, with sheen variations and blotchy absorption.
- Days to weeks: Paint over grease, old wax, or unwashed surfaces starts to bead, pool, or lift in isolated spots.
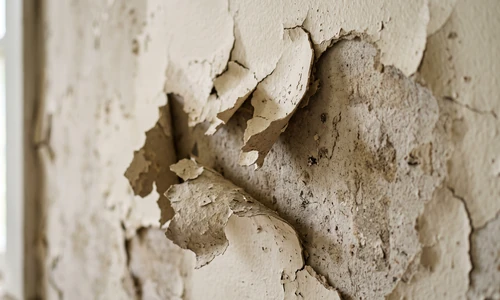
- Weeks to a few months: Peeling and flaking appear, especially at corners, near moisture sources, or where old paint was already loose.
- 1 to 3 months: Stains, water marks, or old paint colors bleed through the new coat as the substrate's chemistry migrates upward.
- 3 to 6 months: Cracking and crazing show up as the substrate expands and contracts against a coat that never bonded properly.
- 6 months and beyond: Fresh plaster painted before it fully cured traps moisture, leading to mold growth and structural staining under the paint film.
Assessing Your Walls Before You Begin
Identifying Your Wall Type
New drywall, older plaster, and previously painted walls all fail differently when prep is skipped, so identifying which one is on the wall changes what to check for. New drywall has a paper-faced surface and joint compound seams that are porous and dusty straight out of construction. Plaster, especially fresh plaster, holds moisture for months and behaves nothing like drywall. Existing painted walls carry whatever condition the old paint is in, and that condition transfers directly to the new coat.
Pre-Work Checks and Measurements
Before opening a paint can, run a few quick diagnostics. Press a piece of painter's tape onto the wall and pull it off; if old paint comes with it, that layer is not stable enough to paint over as-is. Wipe a damp cloth across the surface; if it comes away gray or greasy, cleaning is not optional. Check for a chalky residue by rubbing a dark cloth against the wall, which signals old paint breakdown that primer alone may not fix. On new plaster, a moisture meter reading above manufacturer guidance means the wall needs more cure time before anything else happens.
Essential Equipment and Materials for Wall Prep
Sanding Tools: Manual vs Power
A hand sanding block works fine for small rooms or touch-up repairs, while a pole sander or random orbital sander with dust collection saves significant time on full rooms or whole-home jobs. The trade-off is dust control. Power sanding without a shop vacuum attachment sends fine particles into the air and onto every surface in the room, which then need to be cleaned again before priming.
Primer and Paint Selection
Primer is not interchangeable across wall conditions. Stain-blocking primers are formulated to seal water marks, smoke residue, and old paint colors that would otherwise bleed through. High-build primers help even out texture differences on patched drywall. For the topcoat, premium Benjamin Moore paints and stains offer stronger film build and adhesion characteristics than budget lines, which matters most on surfaces that were already imperfectly prepped. A better paint cannot fix a bad substrate, but it does buy some margin.
Other Materials You Will Need
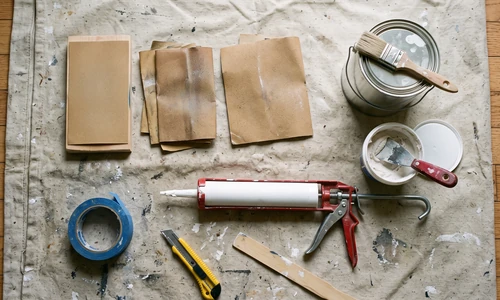
- Spackling compound or joint compound for holes and cracks
- 120 to 220 grit sandpaper for feathering repairs and scuffing glossy paint
- TSP substitute or mild degreaser for kitchen and bathroom walls
- Painter's caulk for gaps at trim, ceiling lines, and corners
- Drop cloths and painter's tape for containment
- A stiff-bristle brush or vacuum attachment for dust removal
Scoping equipment correctly is often where a DIY prep job goes sideways, especially on larger rooms or older homes with unknown numbers of paint layers. If that scoping feels uncertain, Find Your Local Ace Hardware Painting Services office and get a second opinion before buying gear that might not fit the job.
Step-by-Step Wall Prep Process
Step 1: Repair Cracks and Holes
Structural repair comes first because everything after it depends on a stable, flat surface. Fill nail holes, dents, and cracks with spackling or joint compound, let it cure fully, then sand it flush with the surrounding wall. Skipping this step means paint later has to bridge an uneven surface, which is exactly where cracking tends to start.
Step 2: Clean the Walls
Do professional painters wash walls before painting? Yes, and the process varies by room. Dust and cobwebs need only a dry microfiber wipe or vacuum, while kitchen and bathroom walls carry grease and soap film that require a degreaser solution. Walls should be rinsed and fully dry, not damp, before moving to the next step.
Step 3: Sand the Surface
Sanding does two things: it smooths repairs into the surrounding wall and it dulls glossy old paint so new paint has something to grip. Can you paint immediately after sanding? No. Surfaces need to be cleaned of dust and allowed to dry, typically around 24 hours in normal humidity, before priming. Painting directly over sanding dust is one of the most common causes of adhesion failure, because the dust sits between the wall and the paint like a layer of loose sand.
Step 4: Caulk Gaps and Seams
Caulk seals the gaps where drywall meets trim, ceiling, or corners. Left open, these gaps let moisture and air movement work against the paint film at its weakest points, and they show up visually as thin cracks along every trim line.
Step 5: Prime
Primer seals porosity, blocks stains, and gives paint a uniform surface to bond to. This step is not decorative and it is not skippable on bare drywall, patched areas, or stained surfaces. Two coats of finish paint cannot substitute for one coat of the right primer.
Step 6: Paint
Once the wall is repaired, clean, sanded, caulked, and primed, the paint itself is the easy part. Apply in the sequence and thickness the manufacturer recommends, and let each coat cure according to label instructions before adding the next.
The Adhesion Breakdown: Why Paint Doesn't Stick to Unprepared Surfaces
Adhesion failure happens because paint bonds chemically to a stable substrate, and dust, grease, or loose old paint act as a barrier between the two. Paint that lands on a contaminated or unstable surface never actually reaches the wall itself, so it has nothing solid to grip once it dries and starts to move.
A useful way to picture it: stacking blocks on concrete holds up because the base is solid. Stacking the same blocks on loose sand collapses eventually, not because the blocks are wrong but because the foundation gives way. High-gloss old paint compounds this problem, since its slick surface offers almost no mechanical grip for a new coat to key into. Based on adhesive science principles used across industrial paint applications, mechanical and chemical bonding both require direct contact with a stable substrate, which is exactly what dust, grease, and loose layers prevent.
Recognizing the Failure Modes of Unprepared Walls
Peeling and Flaking
Peeling on unprepared walls typically appears within weeks to a few months, driven by moisture intrusion or thermal stress acting on a bond that was never strong to begin with. Immediate peeling usually means the paint never adhered at all, while delayed peeling often points to moisture working its way behind a weak bond over time.
Cracking and Crazing
Cracking shows up as fine surface fractures, often weeks after painting, when the wood or drywall beneath the paint expands and contracts and the paint film cannot flex with it. Loose plaster dust or unsanded old paint amplifies this, since the new coat is essentially floating over a substrate that never bonded to it in the first place. This is a different failure than adhesion loss; the paint is stuck, just poorly, and stress finds the weak points.
Stain Bleed-Through
Water stains, smoke residue, and old paint pigments contain chemicals and moisture that migrate upward through paint that has no barrier layer to stop them. Cleaning removes surface dirt but does nothing to block what is embedded in the substrate. Only a stain-blocking primer creates a seal that stops the migration, which is why the same water mark can reappear through two or three coats of paint applied without one.
Uneven Coverage and Texture Problems
Unsealed drywall and patched areas absorb paint at different rates, drawing pigment and binder unevenly into porous spots the way a sponge pulls in more water in some areas than others. The result is visible sheen differences, blotchy color, or a slightly sandy texture where the paint dried thinner than intended. It is tempting to fix this with extra coats, but adding paint over an unsealed, uneven surface usually multiplies the unevenness rather than solving it.
How Wall Type Changes Prep Failure Modes
New Drywall Without Primer
Fresh drywall has a paper face and porous joint compound at every seam. Without primer, paint absorbs unevenly into the compound while sitting loosely on top of leftover sanding dust along the tape lines. Drywall manufacturers recommend priming specifically to seal joint compound porosity, since it is one of the most predictable causes of blotchy, uneven finish on new construction walls.
Fresh Plaster Without Cure Time
New plaster holds a significant amount of moisture and needs time, sometimes three to six months depending on thickness and climate, to cure before it can safely be painted. Painting over damp plaster traps that moisture behind the paint film, which leads to mold growth, peeling, and in more extreme cases, staining that signals deeper structural moisture damage. The consequence timeline here is measured in months, which is exactly why patience during this stage pays off later.
Existing Painted Walls Without Repair
When old paint is already flaking or peeling and it is not removed first, new paint bonds to the edge of the failing layer instead of to the wall itself. As the old paint continues its own failure, the new coat peels right along with it. Scraping and sanding loose paint before repainting is what breaks this cascade, because it forces the new coat to bond to a stable substrate rather than to a layer that was already on its way out.
Different failure modes call for different repair strategies, and getting that assessment wrong on an older home can turn a simple repaint into a much bigger job. Professional drywall repair and painting crews are set up to diagnose which failure mode is at play before a single coat of new paint goes on.
Moisture and Environmental Factors That Amplify Prep Failures
High humidity accelerates adhesion failure because moisture penetrates unsealed or under-primed surfaces and works against the paint-to-substrate bond from underneath. Temperature swings add mechanical stress on top of that, expanding and contracting a surface that the paint never bonded to firmly in the first place. Seasonal timing matters too; plaster cures more slowly in cold, damp months, which means a wall that seemed dry enough to paint in October may still be releasing moisture well into winter. In consistently humid climates, prep stops being a nice-to-have and becomes the difference between a paint job that lasts years and one that fails within a season.
Recognizing Prep Failure Mid-Project: Diagnostic Signals
A few checks catch prep problems before they fully show up. The tape test, sheen variation across the wall, and paint pooling or beading in certain spots are the three clearest signals that prep was incomplete, and each points to a different missed step, from unremoved old paint to skipped primer to insufficient cleaning.
Run the tape test again after the first coat: if painter's tape pulls up fresh paint along with a layer underneath it, the bond never took. Sheen variation across a dried wall usually traces back to uneven or missing primer. Paint that beads or pools in isolated patches while drying evenly elsewhere often means those spots still had grease or residue when the coat went on. A contractor working in a humid climate once observed peeling within three weeks on unprimed drywall; stopping, sanding the affected area back to a stable surface, and repriming before repainting recovered the job without having to redo the entire room.
The True Cost of Skipped Prep and Whether It Can Be Fixed
Professional painters commonly budget 40 to 60 percent of total project time for prep work, not for the actual painting. That ratio exists because prep done once, correctly, prevents a repaint cycle that costs roughly two to three times the original hours once material waste, scraping, sanding, and repriming are factored in. Skipping prep does not remove the work; it defers it, usually at a higher price.
Prep failure caught early can often be fixed without starting over. If the affected area is under roughly 20 percent of the total surface, targeted sanding and repriming of just that section is usually faster than redoing the whole wall. If failure is widespread, stripping the paint back and starting the prep sequence over is typically faster in the long run than patching failure after failure. Painting directly over a known prep failure without addressing the cause guarantees the same problem returns, usually in the same spots.
Maintenance and Long-Term Care
Do walls need to be prepped before painting even for touch-ups later on? Yes, in almost every case; a properly prepped and painted wall still needs light cleaning and occasional spot-priming before future touch-ups to keep adhesion consistent across the whole surface.
- Wipe down walls periodically with a damp microfiber cloth to prevent grease and dust buildup, especially in kitchens.
- Address small cracks or nail holes as they appear rather than letting them multiply before the next repaint.
- Watch bathroom and kitchen walls for early moisture staining, which signals a ventilation or sealing issue worth fixing before it undermines the paint.
- Keep a note of which primer and paint products were used, since matching future touch-ups depends on knowing the original formulation.
Things to Consider Before You Start
Do you know your wall type? Drywall, plaster, and previously painted surfaces each carry a different risk profile, and guessing wrong changes how much prep the job actually needs.
- Do you have time for the full sequence? Repair, cleaning, sanding, and drying between steps typically take longer than the painting itself.
- Is the room humid or moisture-prone? Bathrooms, kitchens, and below-grade rooms need extra attention to drying time and primer selection.
- Are you working with fresh plaster? If so, confirm cure time before committing to a paint date.
- Is existing paint intact or already failing? Loose or peeling paint needs to be removed, not painted over.
- Can you commit to letting each step dry fully? Rushing dry times is one of the most common causes of the failures covered above.
Being honest about these answers determines which side of the line a project falls on: a straightforward weekend prep job, or one that benefits from a professional assessment before the first coat goes on.
Why Homeowners Bring in Ace Hardware Painting Services
Not every prep job needs a professional, but plenty of homeowners reach a point where the risk of getting it wrong outweighs the time saved doing it alone. Here is what brings people to our crews instead of a second trip to the hardware store:
- Premium Benjamin Moore paints and stains as a standard part of the scope, not an upsell.
- Color consultation and color samples included, so the finish decision happens before any paint goes on the wall.
- A strong workmanship guarantee that backs the prep and the paint job together, not just the topcoat.
- No sanders, sprayers, or specialty gear to rent, research, and return before the weekend is over.
- Background-checked professional crews who diagnose wall type and failure risk before starting.
- A predictable weekday timeline that does not stretch across multiple uncertain drying windows.
- Full cleanup included, so dust and debris from sanding do not become a second project.
- The Ace Helpful retail standard brought directly into the home service.
If a wall is already showing peeling, cracking, or staining, or the prep required looks bigger than a weekend project, Find Your Local Ace Hardware Painting Services office and get an assessment before committing to materials.
Frequently Asked Questions
Do walls need to be prepped before painting?
Yes, in almost every case. The rare exception is a wall with existing paint that is fully intact, clean, and free of gloss buildup. Prep is what determines how long the new paint lasts and how evenly it looks once it dries.
What happens if walls are not prepared before painting?
Unprepared walls commonly show peeling, cracking, uneven coverage, and stain bleed-through, sometimes within weeks. The most visible failure is peeling paint, while hidden failures like stain bleed-through and mold under fresh plaster can take longer to surface.
Can I paint immediately after sanding?
No. The surface needs to be cleaned of dust and allowed to dry, typically around 24 hours, before priming. Painting directly over sanding dust is one of the most common causes of adhesion failure.
Do professional painters wash walls before painting?
Yes, with the method varying by room. Dusty walls need only a dry wipe, while kitchen and bathroom walls with grease or soap residue need a degreaser wash and a full dry before priming begins.
In what order should I prep my walls for painting?
Repair cracks and holes first, then clean, sand, caulk, prime, and paint last. Each step enables the next: repairs need to be sanded flush, clean surfaces sand more evenly, and sanded surfaces hold primer better than dusty or glossy ones.
Which paint preparation mistakes are irreversible versus fixable?
Most mistakes caught early, like missed sanding or a skipped primer coat, are fixable by stopping and correcting the affected area. Painting over unaddressed water damage or actively growing mold is the closest thing to irreversible, since the underlying moisture problem needs to be resolved before any paint will hold.