Should I Paint Ceilings When Repainting a Room?
Painting the walls without touching the ceiling is a common shortcut, and sometimes it is the right call. Other times it leaves a room looking unfinished, with yellowed drywall paint sitting above a crisp new wall color and drawing attention to every imperfection overhead. This guide walks through how to decide whether your ceiling needs paint, what the process actually involves if you move forward, and where the effort pays off versus where it does not.
Should I paint the ceiling when painting a room? Paint the ceiling if it has visible stains, yellowing, architectural detail like coffers or trim, or if you are changing wall color dramatically enough that the old ceiling white will look mismatched. Skip it if the ceiling is flat, in good condition, and already a clean, neutral white that works with your new palette.
If you get partway through this evaluation and realize the ceiling needs more than a fresh coat, whether that is water stains, cracked plaster, or a vaulted ceiling with awkward access, professional help is worth considering at any point. Ace Hardware Painting Services handles ceiling painting as a standalone service or as part of a full room repaint, and a crew can step in whether you have not started or you are three walls into the project and want the ceiling finished right.
Quick Overview of the Decision Process
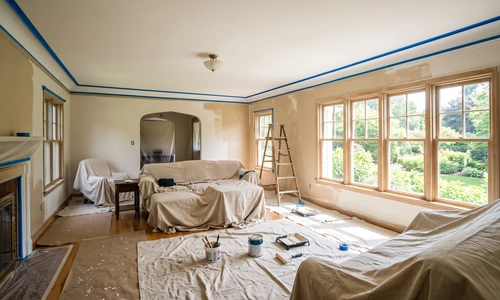
- Assess ceiling condition - check for stains, cracks, peeling, or yellowing that would show through a wall-only repaint.
- Identify architectural features - vaulted, coffered, paneled, or trimmed ceilings usually benefit from paint; flat, featureless ceilings often do not need it.
- Consider room function - bathrooms and kitchens carry moisture concerns that living rooms and bedrooms do not.
- Evaluate lighting - natural and artificial light change how ceiling color reads, which affects whether painting is worth the effort.
- Decide on color relationship - matching the walls, staying white, or going darker each creates a different look and changes your material list.
- Gather equipment and materials - extension poles, the right roller nap, primer, and drop cloths for overhead work.
- Paint ceiling first, then walls, then trim - this sequence prevents visible drips and overspray issues.
- Inspect and apply a second coat if coverage is uneven, then let the room cure before moving furniture back.
Assessing Your Ceiling Before You Begin
Identifying Your Ceiling Type
Ceilings fall into a few broad categories, and the category matters more than personal taste when deciding whether to paint. Vaulted ceilings, with their angled planes and higher volume, tend to look better with color because the color reinforces the architectural shape rather than disappearing into a flat white plane. Coffered and paneled ceilings have built-in grid lines or beams that paint can highlight, often in a contrasting or complementary color to the field. Trimmed ceilings with crown molding give you a natural stopping point for color, since the trim provides a clean break between wall and ceiling treatments. Flat, featureless ceilings in standard-height rooms are the category where painting adds the least. Without architectural interest to reinforce, a flat ceiling in a color other than white can flatten the room's sense of height rather than enhance it.
Pre-Work Checks and Measurements
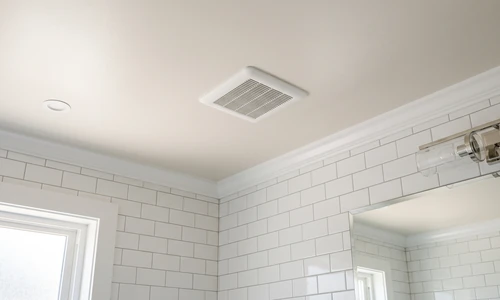
Before deciding, walk the room with a flashlight held at an angle to the ceiling surface. This lighting angle reveals texture, cracks, water stains, and uneven patches that overhead lighting hides during normal use. Note the ceiling height and square footage, since a nine-foot ceiling in a small bedroom behaves differently than a fourteen-foot vaulted ceiling in a great room, both in terms of effort and visual payoff. Check for moisture staining near bathroom fans, kitchen exhaust areas, or any spot below an upstairs bathroom. Stains in these locations often indicate an active or past leak that needs repair before any paint goes up, regardless of your color decision.
Essential Equipment and Materials for Ceiling Painting
Extension Poles, Ladders, and Reach Strategy
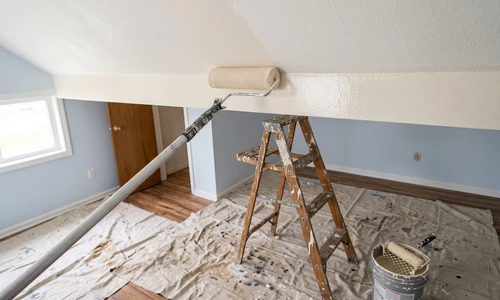
Most residential ceilings can be handled with a roller on an extension pole and a stepladder for cutting in edges, rather than full scaffolding. An 18-inch to 4-foot extension pole covers standard 8 to 9 foot ceilings comfortably from the floor. Vaulted or double-height ceilings change the math; renting a small scaffold tower or hiring the work out often makes more sense than working from a tall ladder for hours at odd angles. Weigh the rental cost and the physical demand of overhead work against your comfort level before committing to do it yourself.
Paint Selection and Sheen
Ceiling paint is typically flat or matte, which hides surface imperfections and minimizes glare from overhead light fixtures. Bathrooms and kitchens benefit from a step up to eggshell or a dedicated bath-and-kitchen formula, since the added sheen resists moisture and mildew better than flat finishes. Benjamin Moore's ceiling paint lines and their Aura and Regal Select formulas in flat or eggshell sheens both offer strong hide in a single coat, which matters when you are working overhead and want to minimize the number of trips up the ladder. If you are painting the ceiling a color rather than white, use the same brand and line for ceiling and walls so sheen and finish behave consistently under the same lighting.
Other Materials You Will Need
- Drop cloths sized to cover the entire floor, not just a work area
- Painter's tape for wall-ceiling junctions and light fixtures
- A roller frame with a 3/8 to 1/2 inch nap roller cover for texture
- An angled sash brush for cutting in corners and edges
- Stain-blocking primer for any water stains or repairs
- Spackle or joint compound for cracks and nail pops
- Safety glasses, since ceiling painting means paint drips downward toward your face
If gathering equipment starts to feel like the harder part of the decision, that is a reasonable signal to bring in help. Ace Hardware Painting Services crews arrive with everything needed for ceiling work already on the truck, and a conversation with your local Ace Hardware Painting Services office can clarify what a professional scope would look like for your specific ceiling.
Step-by-Step Ceiling Painting Process
Step 1: Clear and Protect the Room
Full coverage protection matters more overhead than at wall height. Move or cover furniture completely, since ceiling rolling produces more airborne spatter than wall rolling. Cover floors edge to edge, tape off light fixtures and ceiling fans, and remove anything you can safely detach rather than working around it.
Step 2: Repair and Spot-Prime
Fill cracks and nail pops with spackle, sand smooth once dry, and spot-prime any repaired areas along with visible stains. Skipping primer on a stain is one of the most common mistakes in ceiling work; the stain frequently bleeds back through even multiple coats of regular ceiling paint. A stain-blocking primer stops that bleed-through before it starts.
Step 3: Cut In the Edges
Use an angled brush to paint a 2 to 3 inch band around the ceiling perimeter and around any fixtures, working in small sections so the cut-in edge stays wet enough to blend with the rolled area that follows.
Step 4: Roll the Ceiling First, Before the Walls
What is the correct order to paint a room? Paint the ceiling before the walls and the walls before the trim. Ceiling drips and overspray land on the walls below, and wall paint applied first would need touch-up after ceiling work anyway, so painting top to bottom in this order avoids doing the same section twice.
Roll in overlapping sections roughly 3 feet wide, working from the natural light source toward the far wall so you can see lap marks and correct them while the paint is still wet. Keep a wet edge at all times; letting a section dry before the next pass creates visible roller lines under raking light.
Step 5: Trick of the Trade - Maintain a Consistent Angle and Pressure
What is the trick to painting ceilings? The single most important technique is maintaining consistent roller pressure and a consistent rolling direction across the entire ceiling, rather than switching angles as you tire. Uneven pressure creates visible texture and sheen differences once the paint dries and catches light at an angle.
Step 6: Inspect Under Raking Light and Apply a Second Coat
Once the first coat dries, turn on the room's lighting and inspect from multiple angles. Flat paint hides most imperfections, but thin spots and roller lines still show under raking light from a window or lamp positioned close to the ceiling plane. Apply a second coat wherever coverage looks uneven, and plan for two full coats as the standard rather than the exception, especially over a color change or a repaired area.
Choosing the Right Paint and Finish for Your Ceiling
Application, Cure Time, and Aftercare
Most ceiling paints are touch-dry within an hour but need 24 hours before a second coat and up to 30 days before the film fully cures to its final hardness. Avoid running fans or HVAC directly on the wet paint during the first 24 hours, since accelerated drying on the surface while the underlying layer is still wet can cause uneven sheen. Keep the room ventilated but not blasted with airflow. Once cured, ceiling paint generally needs no more than an occasional light dusting; avoid scrubbing painted ceilings with anything more aggressive than a soft, dry microfiber duster unless the finish is specifically rated for washing.
Accent Ceiling Touch-Up vs Full Ceiling Repaint
Not every ceiling situation calls for a full repaint. If your ceiling is in good condition with only a small stain or scuff, a spot touch-up with primer and matching paint can solve the problem without redoing the entire surface. The tradeoff is a slight risk of visible sheen difference at the touch-up boundary, since flat ceiling paint can flash under certain lighting even with a perfect color match.
- Touch-up makes sense when: the stain or damage is small and isolated, the ceiling paint is less than a few years old and you have leftover paint from the same batch, and the room has soft, diffused lighting that will not highlight sheen variation.
- Full repaint makes sense when: you are changing the ceiling color, the existing paint has yellowed evenly across the whole surface, multiple stains or repairs are scattered around the ceiling, or the room has strong directional light that would expose any touch-up boundary.
Special Considerations for Challenging Ceilings
What are the common ceiling painting mistakes? The most frequent mistakes are skipping primer on stains, painting walls before the ceiling, using the wrong roller nap for a textured surface, working in poor lighting that hides missed spots, and rushing the second coat before the first fully dries. Each of these produces a visible flaw that is difficult to correct after the fact.
Textured or popcorn ceilings need a thicker roller nap, often 3/4 inch or more, to push paint into the texture without matting it down or pulling material loose. Older popcorn ceilings installed before the 1980s can contain asbestos; if you are unsure of the installation date, have the material tested before sanding, scraping, or aggressively rolling it, since disturbing asbestos-containing texture creates a health hazard that paint alone will not solve. Water-damaged ceilings need the source of the leak repaired and the area fully dried before any priming or painting begins, or the stain and the underlying moisture problem will return through the new paint within months.
Vaulted ceilings and other hard-to-reach surfaces carry a higher fall risk and often require scaffolding rather than a stepladder, which changes the equipment cost and time commitment significantly. If your ceiling situation involves any of these complicating factors, a conversation about professional ceiling painting is worth having before you buy materials, since some of these conditions are genuinely riskier to handle without experience.
Maintenance and Long-Term Care
Painted ceilings need minimal upkeep once the paint has fully cured. Dust buildup is the most common issue, and it is best addressed with a soft duster or vacuum attachment rather than water, since flat finishes can burnish or show marks if scrubbed. In bathrooms and kitchens, run the exhaust fan during and after showers or cooking to limit condensation on the ceiling surface, which extends the life of the paint job and reduces the chance of mildew forming in corners.
- Address any new water stains immediately rather than waiting, since the underlying leak will worsen and the stain will spread.
- Keep touch-up paint labeled with the room, brand, color name, and date for easy matching later.
- Ventilate moisture-prone rooms consistently to protect ceiling paint over time.
- Inspect painted ceilings once a year under strong light to catch small issues before they grow.
Things to Consider Before You Start
- Is your ceiling flat and featureless, or does it have architectural detail worth highlighting? Flat ceilings in standard rooms rarely need paint beyond white; detailed ceilings usually benefit.
- Are you comfortable working overhead for extended periods? Ceiling painting is more physically demanding than wall painting and carries more fatigue and drip risk.
- Does your room have active moisture exposure? Bathrooms and kitchens require moisture-resistant finishes and consistent ventilation that add complexity to the decision.
- Do you have access equipment for your ceiling height? A standard 9-foot ceiling is very different from a vaulted great room in terms of tools and safety.
- Are there existing stains, cracks, or a suspected leak? These need repair and possible investigation before any paint decision matters.
- Would a touch-up solve the actual problem, or does the whole ceiling need attention? Be honest about scope before buying a full gallon and rolling out equipment.
Where you land on these questions determines which side of the "should I paint it" line you are on, and there is no universally correct answer that applies to every ceiling in every room.
Why Homeowners Bring in Ace Hardware Painting Services
Deciding to paint a ceiling is one thing; executing it cleanly overhead, especially in a vaulted room or a moisture-prone bathroom, is another. Homeowners bring in professional help for a range of reasons:
- Premium Benjamin Moore paints and stains are part of the standard scope, giving ceilings durable, consistent coverage.
- Color consultation and color samples are included, which helps settle the ceiling-to-wall color relationship before any paint goes up.
- A strong workmanship guarantee backs the finished result.
- No sprayer, scaffolding, or extension equipment to rent, learn, or return once the job is done.
- Background-checked professional crews handle overhead work safely, including vaulted and high ceilings.
- A predictable weekday timeline keeps the project moving without open-ended delays.
- Cleanup is included, so drop cloths, tape, and debris do not become a second project.
- The Ace Helpful retail standard you already trust comes directly into your home.
If your ceiling assessment points toward a full repaint, a vaulted or textured surface, or a moisture-prone room that needs the right finish, reach out to your local Ace Hardware Painting Services office and get an estimate before committing to equipment and materials on your own.
Frequently Asked Questions
Should I paint the ceiling when painting a room?
Paint the ceiling if it shows stains, yellowing, or has architectural detail like vaults, coffers, or trim that would benefit from color. Skip it if the ceiling is flat, clean, and already a neutral white that works with your planned wall color.
What is the correct order to paint a room?
Paint the ceiling first, then the walls, then the trim. This order lets any ceiling drips or overspray land on surfaces that will be painted next, rather than requiring touch-up on already-finished walls.
What are the most common ceiling painting mistakes?
The most common mistakes are skipping stain-blocking primer, painting the walls before the ceiling, using the wrong roller nap for textured surfaces, working without adequate light to spot missed areas, and applying a second coat before the first has fully dried.
Should the ceiling be the same color as the walls?
Matching ceiling and wall color creates a cohesive, enveloping look and de-emphasizes trim, which works well in smaller rooms or spaces with strong architectural lines. Keeping the ceiling white or a lighter neutral is more traditional and emphasizes the wall color as the room's main statement.
Do bathroom and kitchen ceilings need special paint?
Yes. Moisture-prone rooms benefit from an eggshell or dedicated bath-and-kitchen formula rather than flat paint, since the added sheen resists mildew and condensation better. Consistent exhaust fan use also extends the life of the finish regardless of sheen.
What are the current trends in ceiling painting?
Dark accent ceilings, natural wood tones, and bold colors on architectural ceilings have gained popularity, while flat ceilings in most homes remain white. The underlying principle has not changed: ceilings with architectural interest support color, and flat ceilings generally do not need it regardless of trend cycles.