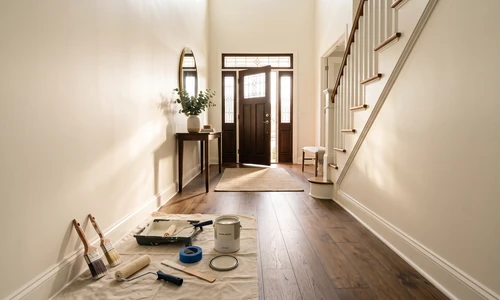
How to Wash Painted Walls
Painted walls collect dust, fingerprints, cooking grease, and everyday grime faster than most homeowners expect. Left unaddressed, that buildup dulls the finish, traps allergens, and makes rooms feel dingy even when everything else is clean. This guide walks you through the full process of washing painted walls safely, from identifying your paint finish and assessing stain types to applying the right cleaning solution and drying without streaks.
What is the best thing to clean painted walls with? Warm water combined with a small amount of mild dish detergent is the widely recommended baseline for cleaning most painted walls. The solution breaks down grease and grime without harsh chemicals that strip or soften latex paint finishes. For walls with a satin, semi-gloss, or eggshell finish, this combination handles most everyday cleaning tasks with no risk to the surface.
If the project scope extends beyond routine maintenance, or if you are dealing with walls throughout an entire home, full home interior painting from Ace Hardware Painting Services covers everything from prep and repair to a fresh, durable finish. Professional crews are available at any stage, whether you want a second opinion before you start or a complete refresh after cleaning reveals more wear than expected.
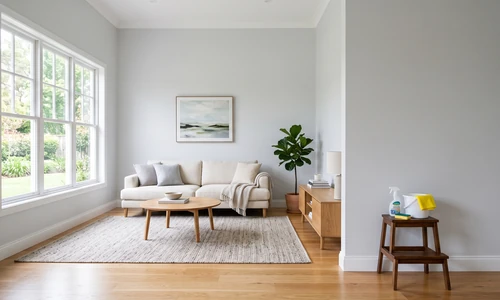
Identify Your Paint Finish Type Before You Start
The Four Common Interior Finish Types
Paint finish type is the single most important variable in how aggressively you can clean a wall. Interior latex paints are the standard for residential walls, and they fall into a predictable gloss hierarchy. Flat finish has no reflective quality; it absorbs light and hides surface imperfections, but it also absorbs moisture and cleaning solutions, making it the most vulnerable finish. Matte finish sits just above flat, with a slight sheen that offers marginally better durability but still requires very light pressure and minimal moisture. Eggshell finish has a soft, low-luster appearance and handles light cleaning well. Satin finish reflects more light and tolerates moderate moisture and gentle scrubbing. Semi-gloss and high-gloss finishes are the most durable, resist moisture readily, and are commonly used in kitchens, bathrooms, and on trim.
To identify your finish, hold a flashlight at an angle against the wall surface in a darkened room. Flat finishes scatter light; semi-gloss throws a visible reflection. If you have the original paint can or paint receipt, check the label for the sheen name directly.
Why Finish Type Determines Your Method
The gloss level corresponds to the density and hardness of the cured paint film. Higher-gloss finishes create a harder, less porous surface that repels water and cleaning solutions rather than absorbing them. Lower-gloss finishes, particularly flat and matte, form a more porous surface that can absorb moisture, causing water marks, sheen dulling, or paint softening if you apply too much solution or scrub too hard. Knowing your finish before you start allows you to calibrate pressure, moisture level, and dwell time accordingly. All subsequent steps in this guide reference finish type directly so you can adjust as you go.
Assess Your Walls for Stain Type and Damage Level
Light Dust and Everyday Grime
Walls in low-traffic rooms accumulate dry dust, pet hair, and airborne particles over time. These deposits sit on the surface rather than penetrating the finish, and they respond well to dry dusting before any wet cleaning begins. A microfiber duster or the soft brush attachment on a vacuum removes loose particles without smearing them into the paint. Skipping this step and going straight to wet cleaning can turn dry dust into muddy streaks that are harder to remove than the original deposit.
Food, Grease, and Fingerprints
Kitchen walls near the stove, countertops, and refrigerator collect cooking grease that bonds to paint. Entry walls and hallways accumulate fingerprints and hand oils at shoulder height. These deposits are water-soluble to a degree but benefit from a detergent solution because the surfactant in dish soap breaks the oil-to-paint bond more effectively than water alone.
Smoke, Water Stains, and Permanent Marks
Smoke residue is carbon-based and oily, requiring more dwell time from your cleaning solution. Water stains, particularly mineral deposits from hard water splash in bathrooms, leave a white or brownish ring that does not respond to standard detergent alone. Ink, crayon, and permanent marker penetrate into the paint film and may require a targeted solvent approach. Identifying the stain category before cleaning prevents wasted effort and reduces the risk of damaging the surrounding finish by over-scrubbing an area that needs a different chemistry entirely.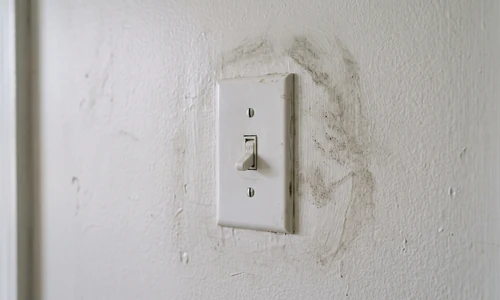
Gather the Right Cleaning Tools and Solutions
Cleaning Equipment Selection
Non-abrasive tools protect paint finishes from microscopic scratching that dulls sheen over time. Soft-bristle sponges, microfiber cloths, and natural cotton rags are the right choices. Rough sponges, nylon scrubbers, and paper towels all create surface abrasion that is invisible in single use but accumulates into visible finish wear with repeated cleaning. Microfiber outperforms cotton for drying because its fiber structure lifts and traps moisture rather than spreading it, which directly reduces streaking on satin and semi-gloss surfaces.
Non-abrasive tools and warm water with mild detergent clean most painted walls effectively because the combination works with paint chemistry rather than against it. Warm water opens surface grime bonds without softening the paint film the way hot water can. Mild dish detergent supplies enough surfactant to lift oil and grease without the alkaline concentration that strips latex binders. Microfiber applicators distribute solution evenly and allow precise pressure control on delicate finishes.
Cleaning Solutions
Can I use Dawn to wash painted walls? Yes. Dawn dish soap is safe for latex paint finishes when diluted correctly. Use a small amount in a bucket of warm water, approximately one teaspoon per gallon as a starting point, though you do not need to be precise. Dawn is formulated for grease removal, which makes it effective on cooking residue and oily fingerprints. Avoid over-concentrating the solution; excess surfactant leaves a soapy residue that attracts more dirt and can dull flat and matte finishes.
Is Murphy's Oil Soap good for painted walls? Murphy's Oil Soap is generally safe on painted wood surfaces and semi-gloss or satin latex walls, but it is not the default recommendation for all painted walls. It contains a soap-based formula that conditions wood but can leave a slight residue on non-wood painted drywall surfaces. If your walls are satin or semi-gloss, it works in a diluted form; flat and matte finishes are better served by plain dish detergent in warm water to avoid any residue buildup.
Other Materials You Will Need
- Two buckets: one for cleaning solution, one for clean rinse water
- Soft-bristle sponge or microfiber cloth for application
- Clean dry microfiber cloths or soft cotton towels for drying
- Mild dish detergent (Dawn or equivalent)
- Warm water (not hot)
- Microfiber duster or vacuum with soft brush attachment for dry dusting
- Drop cloth or towels to protect baseboards and floors from drips
- Painter's tape to protect trim if needed
- White vinegar (diluted) for water stain and bathroom wall applications
- Flashlight for finish identification
If gathering and staging the right materials feels like the point where the project might go sideways, the full home interior service handles all material sourcing, prep, and execution. Find your local Ace Hardware Painting Services to discuss the scope before committing to a supply run.
Step-by-Step Wall Washing Process
Step 1: Dry Dust the Walls First
Removing loose debris before introducing moisture prevents smearing and reduces the cleaning load on your wet solution. Work from the top of the wall downward using a microfiber duster or the soft brush vacuum attachment. Pay attention to corners, baseboards, and the tops of door and window frames where dust accumulates in visible ridges. On flat and matte finished walls, dry dusting alone may be sufficient for walls that are not heavily soiled.
Step 2: Test Your Cleaning Solution on a Hidden Area
Professional painters test cleaning solutions on inconspicuous areas before applying them to visible wall surfaces. Select a hidden spot, the inside of a closet wall, behind a large piece of furniture, or a lower corner near the floor. Apply a small amount of your diluted cleaning solution and let it sit for 15 to 30 minutes. Look for color change, sheen alteration, paint softening, or residue when the area dries. If the test area looks unchanged, the solution is safe to use on the broader wall surface. This step takes less than five minutes to set up and can prevent irreversible finish damage on an entire room.
Step 3: Check Curing Time on Recently Painted Walls
How long after painting should you wait before cleaning walls? Newly painted latex walls need at least two weeks to fully cure before routine washing. Full cure means the paint film has hardened to its maximum durability. Before full cure, the film is still chemically active and vulnerable to water softening and physical abrasion. A small fresh spill can be blotted gently after four to six hours without scrubbing, but any general cleaning should wait for the two-week window. Walls painted more than a month ago are fully cured and ready for standard washing.
Step 4: Wash Walls with the Baseline Method
Fill a bucket with warm water and add a small amount of mild dish detergent. Dip a soft sponge or microfiber cloth into the solution and wring it until it is damp, not dripping wet. Excess moisture on flat or matte finished walls absorbs into the paint film and can create water marks. Work in small sections of roughly two to three square feet, starting at the top of the wall and moving downward. Apply light, circular motions and let the solution do the work rather than pressing hard into the surface. The pressure required is comparable to wiping a countertop, not scrubbing a tile grout line. Rinse the sponge frequently in your second bucket of clean water to avoid redepositing grime onto the wall. Work section by section across the full wall before moving to the next row down.
Satin and semi-gloss walls tolerate slightly more moisture and moderate pressure. Flat and matte walls require a barely damp sponge and minimal pressure. If you notice the paint surface beginning to look dull or feel slightly tacky while cleaning, stop and dry the area immediately; those are signs you have applied too much moisture or pressure for the finish.
Step 5: Rinse Sections as You Go
After washing each small section, rinse the area with a clean damp cloth wrung in plain water to remove soap residue. Soap left on the wall surface dries into a slightly sticky film that attracts new dust and can dull the finish over time. Rinsing each section before moving on prevents residue from migrating across the wall as you work.
Step 6: Dry Walls Immediately to Prevent Streaks
Why does your painted wall get streaks when you clean it? Streaks form when mineral deposits in water dry on the wall surface, when soap residue is not fully rinsed, or when water is allowed to air-dry rather than being wiped away. Hard water contains calcium and magnesium minerals that leave a white or cloudy residue as the water evaporates. Using a clean, dry microfiber cloth to wipe each section immediately after rinsing removes water before minerals can deposit. Work in the same small sections as your washing pass, using gentle circular pressure. Do not allow any section to air-dry. If your area has notably hard water, the drying step matters more than the washing chemistry in terms of streak prevention; even a perfect cleaning solution cannot overcome mineral residue if the water is left to evaporate on the surface. Allow 30 to 60 minutes after completing a wall for the surface to dry fully before evaluating the result under normal lighting.
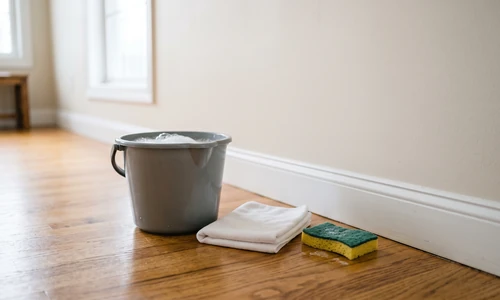 Handle Stubborn Stains with Problem-Specific Approaches
Food and Grease Stains
Cooking grease that has bonded to wall surfaces over time needs a slightly stronger detergent concentration than everyday grime. Apply the solution directly to the sponge rather than diluting it further, allow it to sit on the stain for two to three minutes, then wipe with light pressure. Repeat rather than scrubbing harder on the first pass. Satin and semi-gloss walls in kitchens handle this approach well; matte or flat kitchen walls may show sheen disruption if you dwell the solution too long, so limit the contact time and use a very lightly dampened cloth.
Smoke and Stubborn Residue
Smoke residue is carbon-based and oily, and standard warm water and detergent often requires multiple passes to address it. Increase the detergent concentration slightly in your solution and apply it to the surface, allowing it to dwell for five to ten minutes before wiping. The dwell time lets the surfactant penetrate the oily carbon layer rather than just moving it around. Use gentle, consistent pressure and expect two or three passes before the wall is clean. Resist the urge to scrub harder; aggressive friction on smoke-stained walls removes paint finish along with the residue. Walls that have experienced heavy or prolonged smoke exposure may have staining that has penetrated into the paint film itself, at which point cleaning will not fully restore the appearance and repainting becomes the practical solution.
Water Stains and Bathroom Walls
Water stains on bathroom walls near the tub or shower are mineral deposits from water splash, not dirt. Warm water and detergent alone will not dissolve mineral buildup effectively. Add a small amount of white vinegar to your cleaning solution (diluted, roughly one part vinegar to three parts water) alongside the detergent to provide light acid action against calcium and mineral deposits. Apply the solution, allow it to dwell for three to five minutes, then wipe with gentle pressure. For humidity management, run the bathroom exhaust fan during cleaning and for at least 30 minutes after to remove moisture from the space and reduce the risk of mold growth under or behind the paint film. Satin and semi-gloss finishes are better suited to bathroom walls than flat or matte finishes because their lower porosity resists moisture absorption and mold penetration. If your bathroom walls are painted in flat or matte and show recurring water staining, the underlying issue is finish selection rather than cleaning technique.
Ink, Crayon, and Permanent Marker
These marks penetrate the paint film rather than sitting on the surface, which is why standard detergent solutions have limited effect. A small amount of rubbing alcohol on a microfiber cloth, applied with light dabbing pressure rather than rubbing, breaks down the ink or wax without spreading the stain. Test this approach on your hidden area first, particularly on flat and matte finishes, because alcohol can dull or dissolve the paint binder in those lower-gloss coatings. If the mark does not respond after two or three gentle passes, it has likely penetrated too deeply for surface cleaning and will need paint touch-up to conceal.
Choosing the Right Cleaning Solution for Your Finish Type
Finish-Matched Application and Aftercare
Flat and matte finishes require the most conservative approach: barely damp applicator, no dwell time beyond what is needed to loosen the grime, and immediate drying. These finishes are designed for light cleaning only. Repeated wet cleaning accelerates finish wear, so addressing the cause of the soiling (ventilation in kitchens, air filtration, routine dry dusting) reduces the frequency of wet washing. Eggshell finishes tolerate light wet cleaning with mild detergent on a damp sponge and hold up to monthly cleaning in moderate-traffic rooms. Satin finishes are the most practical choice for living spaces and hallways: they handle regular warm water and detergent washing, resist moisture, and clean up to semi-gloss durability standards in most household contexts. Semi-gloss and gloss finishes, typically used in kitchens, bathrooms, and on trim, tolerate the most aggressive cleaning of any interior finish type. They can be washed with slightly higher detergent concentrations, slightly warmer water, and light to moderate pressure without risk of sheen damage. After any wet cleaning, allow all finish types a minimum of 30 minutes of drying time before evaluating the result or applying touch-up paint.
Special Considerations for Challenging Wall Types
Textured walls, including knockdown, orange peel, and sand finish textures, require extra care because the texture traps cleaning solution in the low points and creates pooling that can soften or separate the paint from the substrate if moisture dwells too long. Work in even smaller sections, use a barely damp sponge, and dry thoroughly with a blotting motion rather than wiping to avoid dragging solution across the texture ridges. Very old painted surfaces, particularly walls that have been repainted many times over decades, may have a paint film thickness and adhesion condition that is sensitive to moisture; test carefully and stop immediately if any paint softening or peeling appears during washing.
Walls with wallpaper that has been painted over present a specific risk: moisture from cleaning can penetrate through the paint film at seams and begin to loosen the wallpaper adhesive, causing bubbling or peeling. Keep these walls as dry as possible during cleaning and limit the washing to dry dusting or very light damp-wiping. Plaster walls found in older homes absorb moisture differently than drywall; they are more porous and require the same conservative flat-finish approach even if the paint sheen is satin or semi-gloss, because the substrate rather than the paint drives the moisture sensitivity.
When wall conditions are complex, old, or uncertain, a professional assessment before washing protects the surface. Ace Hardware Painting Services crews assess wall condition as part of every full home interior project scope. Call Today to discuss your specific walls before committing to a cleaning or repainting approach.
Maintenance and Long-Term Care
How often should you clean painted walls? Routine dry dusting every one to three months prevents the dust accumulation that makes wet cleaning necessary. Deeper wet washing one to two times per year is sufficient for most living spaces in average households. Kitchens benefit from more frequent attention, roughly every two to three months for the areas near cooking surfaces, because grease deposits harden over time and become progressively harder to remove without affecting the finish. Bathrooms with high humidity should be dry-wiped after showers to reduce mineral deposit accumulation on the paint surface.
- Dry dust all walls every one to three months using a microfiber duster or vacuum soft brush attachment.
- Wet wash living areas and bedrooms one to two times per year with diluted mild detergent solution.
- Clean kitchen walls near cooking surfaces every two to three months.
- Address bathroom walls after any visible water splash or spray to prevent mineral deposit buildup.
- Spot-clean fingerprints, scuffs, and food marks as they occur rather than letting them accumulate.
- Inspect walls after cleaning for chips, scuffs, or finish wear that may benefit from touch-up paint.
- Store original paint color information (can label, paint code, or receipt) so touch-up matching is accurate.
- Repaint walls showing sheen loss, widespread staining, or persistent discoloration that cleaning does not resolve.
Why Homeowners Bring in Ace Hardware Painting Services
Washing walls is achievable for most homeowners, but when the condition of the paint surface itself is the issue, cleaning is only a temporary measure. Here is what Ace Hardware Painting Services brings to interior wall projects:
- Premium Benjamin Moore paints and stains are used as the standard on every project, providing durable, cleanable finishes that hold up to long-term maintenance.
- Color consultation and color samples are included, so finish selection and color decisions are supported by professional guidance rather than guesswork at the paint counter.
- A strong workmanship guarantee backs every project, so you are not left managing quality issues after the crew leaves.
- No sprayer, extension tools, or specialty equipment to rent, learn, or return. Professional crews arrive with everything the project requires.
- Background-checked professional crews handle every aspect of the work, from surface preparation and repairs to final coat application.
- A predictable weekday timeline lets you plan around the project without open-ended scheduling uncertainty.
- Cleanup is included. The space is left clean and ready to use when the work is done.
- The Ace Hardware name and service standard travels with every crew, bringing the reliability homeowners already associate with the retail brand into their home.
When cleaning reveals that your walls need more than maintenance, or when you simply want durable, professionally applied finishes that are easier to keep clean going forward, your local Ace Hardware Painting Services office is ready to help. Get an Estimate today.
Frequently Asked Questions About Washing Painted Walls
What is the best thing to clean painted walls with?
Warm water with a small amount of mild dish detergent is the widely recommended baseline for most painted walls. The combination breaks down grease and grime without the harsh alkaline concentration that strips latex paint binders. For satin and semi-gloss finishes, this solution handles routine cleaning reliably. Flat and matte finishes need the same solution applied with a barely damp cloth and minimal pressure to avoid finish damage.
Can I use Dawn dish soap on painted walls?
Yes. Dawn is safe for latex paint finishes when diluted in warm water. Use a small amount per gallon of water rather than applying it directly to the wall. Dawn is formulated for grease removal, which makes it particularly effective on kitchen walls and areas with oily deposits. Avoid over-concentrating the solution; too much detergent leaves a residue that attracts new dust and can dull lower-gloss finishes over time.
How long after painting should I wait before cleaning the walls?
Newly painted latex walls need at least two weeks to fully cure before routine washing. The curing process hardens the paint film to its maximum durability; cleaning before this window can soften the film, cause paint to transfer onto your cloth, or create permanent marks. A fresh spill can be blotted carefully after four to six hours without scrubbing, but any general wet cleaning should wait for the full two-week period.
Why do my painted walls streak when I clean them?
Streaks most commonly result from water mineral deposits that dry on the surface, soap residue that was not fully rinsed, or water that was allowed to air-dry rather than being wiped off immediately. Hard water areas see this problem more frequently because calcium and magnesium in the water leave a cloudy residue as the water evaporates. Drying each section immediately with a clean dry microfiber cloth after rinsing prevents most streaking regardless of water quality.
What cleaning tools are safe for painted walls without scratching the finish?
Soft-bristle sponges, microfiber cloths, and natural cotton rags are the appropriate choices for painted wall surfaces. Rough sponges, nylon scrubbers, and paper towels all create abrasion that accumulates into visible finish wear with repeated cleaning, particularly on lower-gloss finishes. Microfiber is the best option for drying because its fiber structure lifts moisture rather than spreading it, which reduces streaking on satin and semi-gloss surfaces.
What should I do if cleaning damages the paint finish?
If washing reveals paint damage, including dull patches, sheen loss, chips, or areas where paint transferred to your cloth, stop cleaning that section immediately and allow it to dry fully. Small chips and scuffs can be addressed with touch-up paint matched to the original color; store your original paint can label or color code for this purpose. Larger areas of damage, widespread sheen loss, or paint that consistently softens during cleaning are signs that the wall needs repainting rather than further cleaning attempts.