Can You Paint Pressure Treated Wood
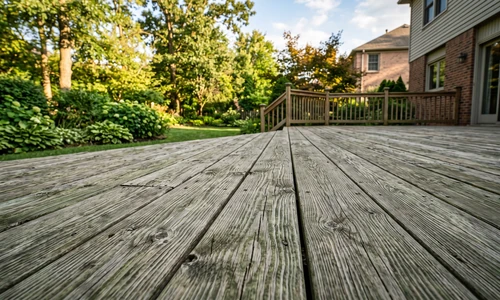
Pressure-treated wood shows up on decks, fences, raised garden beds, and exterior framing across millions of homes. The question of whether you can paint it comes up as soon as those projects are built, but the answer requires more than a simple yes. Yes, you can paint pressure-treated wood, and doing it correctly adds years of surface protection. The challenge is that the same chemical process that makes the wood rot-resistant also makes it hostile to paint if you skip the preparation steps. This guide covers the mechanism behind that hostility, the testing methods that tell you when the wood is ready, and the full application sequence from surface prep through long-term maintenance.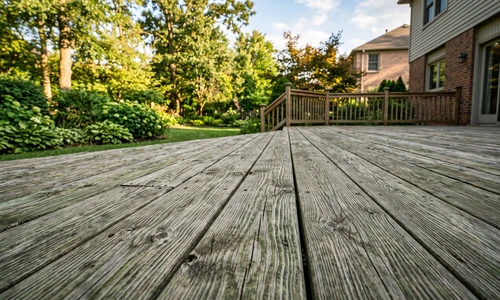
Can you paint pressure-treated wood right after construction? No. New pressure-treated lumber ships with moisture content between 45 and 90 percent, and paint cannot bond to wood that wet. The preservative chemicals forced into the wood fibers during treatment add another layer of complexity. Both factors must be resolved before any coating goes on. The wood must dry to 12 to 15 percent internal moisture content, and the surface must be clean of mill glaze, oxidation, and contaminants before primer touches the boards.
If the drying window, surface prep sequence, or product selection feels like a project in itself, exterior wood painting through Ace Hardware Painting Services handles every stage with the materials and process knowledge to get it right the first time. That option is available at any point, whether you are just starting to plan or already partway through prep.
Quick Overview of the Painting Process for Pressure-Treated Wood
- Stage 1 - Wait for the wood to dry: New pressure-treated lumber must offgas and release moisture before any coating is applied. This takes weeks to months depending on climate.
- Stage 2 - Test moisture readiness: Use the water droplet test or a moisture meter to confirm internal moisture content is at or below 15 percent.
- Stage 3 - Clean the surface: Pressure wash or scrub to remove mill glaze, dirt, mold, and oxidation. Allow 48 to 72 hours of drying after washing.
- Stage 4 - Apply latex primer: Coat all surfaces with an exterior latex primer. Allow full drying time per the product label, typically 2 to 4 hours.
- Stage 5 - Apply first coat of exterior latex paint: Brush edges and detail areas first, then roll broad surfaces. Allow 3 to 4 hours between coats.
- Stage 6 - Apply second coat: Second coat ensures complete coverage and maximum durability.
- Stage 7 - Maintain on schedule: Inspect annually and plan to repaint every 3 to 5 years depending on exposure.
Understanding Pressure-Treated Wood Before You Begin
What Pressure Treatment Does to the Wood
Pressure treatment forces preservative compounds deep into wood fibers using a vacuum-and-pressure chamber. The most common modern preservatives are micronized copper azole (MCA) and alkaline copper quaternary (ACQ), both of which replaced the older chromated copper arsenate (CCA) formulation in residential lumber after 2004. These copper-based compounds bind to the cell structure of the wood and resist fungal growth, insect activity, and moisture-related decay.
The problem for paint adhesion is twofold. First, the process saturates the wood with water as the carrier medium for the preservative solution, driving moisture content far above what kiln-dried lumber carries. Second, residual preservative compounds on the wood surface create a chemically complex layer that interferes with how primer and paint binders cure and form a film. Oil-based paints are especially vulnerable because they cannot transmit moisture vapor; any remaining moisture in the wood pushes outward against the paint film, causing blistering and peeling within months. Latex paint allows vapor transmission, which is why it is the only appropriate choice for this substrate.
Pre-Work Checks and Measurements
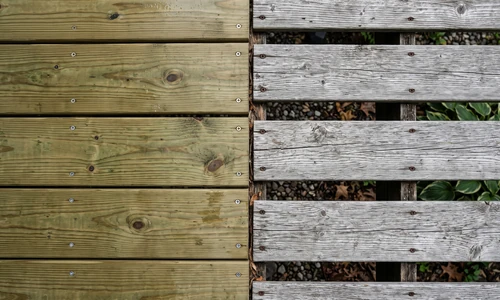
Before any other step, assess the wood's actual condition. Check the purchase date or installation date to estimate how long the lumber has been drying in place. Look at the surface color: fresh pressure-treated lumber has a green or brownish-green cast from the copper preservative, and that color fades as drying progresses. Run a finger across the surface; freshly treated lumber often feels damp or slightly waxy. Inspect for surface checks (small cracks running along the grain), which are normal and indicate drying is occurring. Finally, check for mill glaze on boards cut and milled without significant weathering: the surface will look slightly shiny or polished compared to rougher, more textured areas.
Essential Equipment and Materials for Painting Pressure-Treated Wood
Application Tools: Brush, Roller, and Sprayer Considerations
For most residential decks and fences, a combination of a 3-inch angled brush and a 9-inch roller with a 3/8-inch nap cover handles both detail work and broad surface coverage efficiently. Use the brush for board ends, railings, balusters, and any tight areas where a roller cannot reach. The roller speeds up flat surface coverage significantly on deck boards and fence panels.
An airless sprayer is an option for large fence runs or extensive deck surfaces, but it requires masking surrounding areas carefully and maintaining the correct pressure setting to avoid overspray and uneven film thickness. Sprayers also consume paint faster and require more cleanup time. Unless the project covers very large surfaces, brush and roller provide better control with less setup overhead.
Primer and Paint Selection for Pressure-Treated Wood
What paint will stick to pressure-treated wood? Water-based exterior latex paint applied over a latex primer is the correct choice. Latex formulations allow moisture vapor transmission through the paint film, which is essential when working with wood that may still be releasing residual moisture. Oil-based paints block vapor transmission entirely and will fail through blistering and delamination within a single season. For primer, select an exterior latex formulation specifically rated for bare wood or previously uncoated surfaces. Acrylic latex paints offer superior UV resistance and flexibility through temperature cycles, making them the preferred top coat for exterior pressure-treated applications. Benjamin Moore's exterior acrylic lines deliver consistent adhesion, color retention, and durability across high-exposure wood surfaces.
For sheen selection, flat and matte finishes show surface texture but accumulate dirt more easily and are harder to clean. Satin is the most practical choice for decks and fences: it resists moisture, cleans well, and does not highlight surface imperfections the way semi-gloss does. Semi-gloss is appropriate for trim elements or railings where a harder, more reflective surface is preferred.
Other Materials You Will Need
- Moisture meter (preferred) or spray bottle for the water droplet test
- Pressure washer or stiff-bristle scrub brush and deck cleaner
- 80 to 120-grit sandpaper or sanding block for mill glaze removal
- Painter's tape and plastic sheeting for masking adjacent surfaces
- Drop cloths for ground protection
- Stir sticks and a paint grid or tray
- Extension pole for roller
- N95 respirator for sanding and primer application
- Chemical-resistant gloves and eye protection
- Clean rags or paper towels
If sourcing the right primer, confirming paint compatibility, or renting equipment feels like where this project could stall, your local Ace Hardware Painting Services office can scope the full project and get it scheduled without the equipment overhead.
Step-by-Step Process for Painting Pressure-Treated Wood
 Step 1: Test and Confirm Dryness
Moisture management is the single most critical step. New pressure-treated lumber arrives at 45 to 90 percent moisture content. Industry standards recommend confirming internal moisture content is at 12 to 15 percent or below before applying any coating. Two testing methods are available.
The water droplet test requires no equipment: place 3 to 5 drops of water on the wood surface and observe what happens. If the drops absorb into the wood within 10 minutes, the wood is dry enough to accept primer. If the drops bead and sit on the surface, the wood is still too wet. This test measures surface absorption only, so it is useful as a quick on-site screen but does not confirm internal moisture levels.
A moisture meter provides more reliable data. Press the pins into the wood at multiple points across the surface and read the internal moisture percentage directly. Target 15 percent or below, with 12 percent being the most reliable baseline for good adhesion. Use the meter at different points on the same board, since drying can be uneven, especially near board ends where moisture releases faster than from the center.
Step 2: Account for Climate and Season When Scheduling
How long do you have to wait to paint pressure-treated wood? The answer varies significantly by climate. In dry regions with low humidity and consistent sun exposure, pressure-treated lumber may reach paintable moisture levels in 2 to 4 weeks during summer. In humid climates along the Gulf Coast or Pacific Northwest, or during fall and winter in northern states, drying may require 2 to 3 months or longer. In northern regions where winter temperatures limit evaporation and outdoor humidity stays elevated, plan for 3 to 4 months minimum if the wood was installed in late fall.
The most reliable scheduling approach is to plan painting projects in late spring through early fall, when temperatures stay between 50 and 85 degrees Fahrenheit and humidity is moderate. Avoid painting when rain is forecast within 48 hours, when temperatures will drop below 50 degrees overnight, or when the wood surface temperature is above 90 degrees from direct sun, which causes primer and paint to dry too quickly and reduces adhesion.
Step 3: Clean and Prepare the Surface
Thorough surface preparation is what separates a finish that lasts from one that fails within a season. The goal is a clean, slightly textured surface with no contaminants blocking primer adhesion.
For new lumber, address mill glaze first. Mill glaze is a polished, slightly sealed layer created by the sawmill blade during cutting. It looks shiny compared to rougher areas and resists liquid penetration. Sand the affected areas lightly with 80 to 100-grit sandpaper until the surface feels uniformly rough to the touch. You do not need to sand the entire surface, only glazed areas.
Next, clean the wood to remove dirt, mold, mildew, and any surface deposits. A pressure washer on a 40-degree tip setting at moderate pressure (1200 to 1500 PSI) works effectively for most surfaces. For tighter areas, a stiff-bristle brush with a deck cleaning solution removes the same contaminants without the overspray. After washing, allow 48 to 72 hours of drying time before applying primer. Do not rush this step; wet wood after washing will behave the same as insufficiently dried new lumber.
Inspect for tannin bleeding on older boards, which appears as brownish-yellow staining on the surface. Tannins are water-soluble extractives from the wood that migrate outward with moisture. A stain-blocking primer handles this; a standard latex primer may allow tannin bleed-through, which discolors the final paint coat.
Step 4: Apply Latex Primer
Primer is not optional on pressure-treated wood. It creates the adhesion layer between the chemically complex wood surface and the topcoat. Apply exterior latex primer at the manufacturer's recommended coverage rate, typically 350 to 400 square feet per gallon. Work in sections, using the brush for edges, board ends, and tight spots, then rolling broad surfaces to even out coverage.
Pay extra attention to board ends, which are the most absorbent surfaces on any cut lumber and the most common point for moisture infiltration and future peeling. Apply a slightly heavier coat at cut ends. Allow the primer to dry fully before applying the topcoat; most exterior latex primers require 2 to 4 hours at 70 degrees Fahrenheit, but check the product label for the specific cure window, especially in humid or cool conditions.
Step 5: Apply Two Coats of Exterior Latex Paint
Two coats of exterior latex paint deliver the protection and color depth the surface needs. Apply the first coat using a brush for cut edges and detail areas, then roll broad surfaces with the 3/8-inch nap roller. Work with the wood grain on deck boards for a cleaner finish. Allow 3 to 4 hours of drying time between coats, or the time specified on the product label.
Apply the second coat in the same sequence. The second coat seals any thin spots from the first application and builds the total film thickness needed for durability. At this stage, confirm that environmental conditions remain within range: temperature between 50 and 85 degrees, no rain within 48 hours of the final coat, and relative humidity below 85 percent for proper film formation.
Paint vs. Stain for Pressure-Treated Wood
Choosing the Right Finish for Your Project
Is it better to stain or paint pressure-treated wood? Both are viable, and the right choice depends on your aesthetic goals, climate, and tolerance for maintenance. Paint forms an opaque surface film that delivers strong UV protection and hides wood grain completely. It provides 3 to 5 years between repainting cycles with proper application. The trade-off is that paint wear is visible: peeling and flaking appear clearly when the finish deteriorates, requiring full surface prep before recoating.
Stain penetrates the wood surface rather than forming a film on top of it. This means the finish integrates into the grain, preserving natural wood texture and color variation. Solid-color stains offer more coverage; semi-transparent stains let the grain show through. Most exterior stains on pressure-treated wood need reapplication every 2 to 3 years, but the maintenance process is simpler because stain does not peel; it simply fades, and a fresh coat can go over the old one with minimal prep.
In high-UV, dry climates, paint's surface protection holds up well and the longer interval between applications is an advantage. In humid regions with significant seasonal moisture swings, stain's penetrating nature may perform more reliably because it moves with the wood through expansion and contraction cycles rather than sitting on top as a film that can crack. Pressure-treated wood does not require a finish for structural protection since the preservative handles rot and insect resistance. The finish choice is about surface appearance, UV protection, and maintenance preference.
Special Considerations for Challenging Pressure-Treated Surfaces
Some pressure-treated wood situations require extra attention beyond the standard process. Older lumber that has been exposed and untreated for several seasons develops a gray, weathered surface layer from UV oxidation. This oxidized layer is not structurally compromised, but it does not accept primer well. Use a wood brightener or oxalic acid-based wood cleaner after pressure washing to restore the surface to a more receptive state before priming. After treatment, allow the surface to dry fully, at least 48 hours, before applying primer.
Horizontal surfaces like deck boards face more demanding conditions than vertical fence boards because they collect standing water, direct foot traffic, and sustained UV exposure. For deck boards, a floor-specific exterior paint or deck paint formulated for foot traffic provides harder film durability than standard exterior wall paint. Apply an additional coat on horizontal surfaces as a standard practice.
Wood used in ground-contact applications or near soil, such as retaining wall timbers or posts embedded in concrete, requires ground-contact-rated pressure-treated lumber (UC4B or UC4C rating). These boards have higher preservative concentrations and may require longer drying windows before the surface is ready for coating. Do not use interior-rated (UC1 or UC2) treated lumber in these applications regardless of what paint or primer you plan to apply.
If any of these edge cases describe your project, professional exterior wood painting through Ace Hardware Painting Services brings the right product selection and surface prep protocol for each condition without the guesswork.
Maintenance and Long-Term Care for Painted Pressure-Treated Wood
Painted pressure-treated wood requires periodic inspection and planned repainting to maintain surface protection. Inspect the painted surface annually, ideally in spring after winter weather stress. Look for peeling, chalking (a chalky powder on the surface from UV degradation), cracks forming along the grain, or color fading significant enough that the wood is becoming visible through the paint film.
- Repaint every 3 to 5 years under normal residential conditions. High-UV or high-humidity climates shorten this to 2 to 3 years. Quality paint and correct initial application extend it toward the 5-year end.
- Between paint cycles, wash the surface annually with a mild deck cleaner and a soft-bristle brush to remove mildew, dirt, and pollen. Rinse thoroughly and allow to dry before any touch-up work.
- For touch-ups on isolated spots, sand the area lightly to rough up the existing paint, apply a spot coat of primer to bare wood areas, then apply a matching topcoat. Note that touch-up colors rarely match aged paint exactly; full-surface repainting delivers the most uniform result.
- When the full repaint cycle arrives, assess whether to strip the old paint or recoat over it. If the existing paint is adhering well with no peeling, a light sanding and cleaning followed by a fresh topcoat is sufficient. If peeling is widespread, strip to bare wood, re-prime, and repaint from scratch.
- Apply a sealer under the topcoat during scheduled repainting cycles. Sealers reduce moisture infiltration at the wood surface and can extend repainting intervals by 1 to 2 years.
- Check and recoat board ends at each maintenance cycle. End grain absorbs and releases moisture faster than face grain and is the most common point of paint failure on decks and fences.
Things to Consider Before You Start
Before committing to painting a full pressure-treated deck or fence, work through these questions honestly.
- Is the wood actually dry enough to paint right now? If the project was built within the last 6 weeks and you are in a humid climate, the answer is almost certainly no. Rushing this step costs more to fix than the time you save.
- Do you have a reliable way to confirm moisture content? The water droplet test works for quick screening. A moisture meter is worth the investment for any surface larger than a small fence section.
- How is the surface condition? New lumber with mill glaze, older lumber with oxidation, and weathered lumber with mold or mildew each require different prep steps. Skipping the right prep step for your specific surface is the most common cause of early paint failure.
- Are you comfortable working with a pressure washer and managing the drying window afterward? Washing is essential but adds a multi-day pause before you can prime. Project scheduling needs to account for that.
- What is the total surface area? Small fence sections are manageable DIY projects. A full deck with railings, balusters, and stair stringers is a much larger commitment of time, materials, and physical effort.
- Are you prepared for the ongoing maintenance cycle? Painted exterior wood requires periodic repainting. If the idea of a recurring maintenance obligation is a concern, stain may be a more practical long-term choice.
- Do you have the right protective equipment for sanding and priming? Sanding pressure-treated lumber releases copper-containing dust that requires respiratory protection. This is not an area where skipping the N95 is a reasonable shortcut.
If the answers to most of these questions are straightforward, this is a project you can execute well. If several of them give you pause, that is useful information about where the project may benefit from professional handling.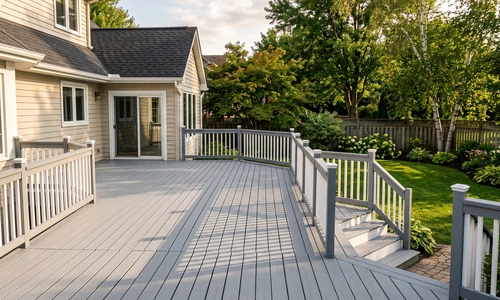
Why Homeowners Bring in Ace Hardware Painting Services
Painting pressure-treated wood correctly requires patience, preparation, and the right materials. Homeowners who hand this project off to Ace Hardware Painting Services get all three without managing any of it themselves.
- Premium Benjamin Moore exterior paints and stains are standard on every project. The product quality that drives long-term durability and extended repaint intervals is built into the scope from day one.
- Color consultation and color samples are included. Choosing between paint and stain, selecting sheen, and landing on the right color for the home's exterior is part of the process, not an add-on.
- Our crews handle the full surface prep sequence: moisture assessment, cleaning, mill glaze treatment, and primer application. The steps most likely to be skipped in a DIY project are the ones our crews execute as standard procedure.
- No sprayer, pressure washer, or specialty gear to rent, learn, or return. The tools required for proper preparation and application come with the crew.
- Background-checked professional crews show up on a predictable weekday schedule. You do not need to manage a shifting timeline around weather windows and drying periods.
- A strong workmanship guarantee backs the finished result. If the work does not hold up, the resolution process is already defined.
- Complete cleanup is included. Paint materials, drop cloths, and prep debris are cleared at the end of the job.
- The Ace Hardware name stands behind every project. The service standard homeowners know from Ace retail stores extends to the home services experience.
Get an Estimate from your local Ace Hardware Painting Services office and get your pressure-treated wood project scoped and scheduled by a crew that handles it correctly from the first day.
Frequently Asked Questions
Can you paint pressure-treated wood right after it is installed?
No. Freshly installed pressure-treated wood carries 45 to 90 percent moisture content and cannot accept paint. The wood must dry to 12 to 15 percent internal moisture before primer is applied. Attempting to paint before the wood reaches this level results in adhesion failure, blistering, and peeling within one season.
What paint will stick to pressure-treated wood?
Water-based exterior latex paint applied over an exterior latex primer is the correct choice. Latex allows moisture vapor to transmit through the paint film, which is essential given residual moisture in pressure-treated wood. Oil-based paints block vapor transmission and will delaminate on this substrate. Acrylic latex formulations offer the best UV resistance and long-term flexibility for outdoor exposure.
How do you test if pressure-treated wood is dry enough to paint?
Two methods work reliably. The water droplet test: place several drops of water on the surface and watch for absorption. If they absorb within 10 minutes, the surface is ready. A moisture meter provides a more precise reading: target 15 percent or below, with 12 percent as the ideal baseline. Use the meter at multiple points since drying can be uneven across the same board.
What happens if you paint pressure-treated wood too soon?
Paint applied to wet pressure-treated wood cannot bond correctly. As the wood continues releasing moisture vapor, it pushes against the uncured paint film and causes blistering and peeling, often within a single season. Correcting premature painting requires stripping the failed coating completely, allowing the wood to finish drying, and restarting the full prep and application process.
Is it better to stain or paint pressure-treated wood?
Both work well when applied correctly. Paint delivers opaque coverage and 3 to 5 years between maintenance cycles but shows wear visibly through peeling when it fails. Stain penetrates the wood and fades rather than peels, requiring reapplication every 2 to 3 years with less intensive prep. In humid climates with significant seasonal moisture swings, stain's flexibility can outperform paint's surface film over time.
Can a fast-drying primer let you skip the waiting period for pressure-treated wood?
No. Fast-drying primers accelerate surface cure but cannot compensate for elevated internal moisture content. The problem is not surface-level: moisture vapor originating from inside wet wood continues to push outward after primer is applied, disrupting the bond between primer and wood regardless of how quickly the primer surface dries. The 12 to 15 percent internal moisture standard must be met before any primer is applied.