Can Professional Painters Paint Over Dark Wall Colors?
Dark walls have a way of making a room feel closed off, and once the trend fades or the light shifts, that deep navy or charcoal can start to feel like a mistake you have to live with. The good news is that painting over dark walls is a completely normal renovation task, not a gamble. This guide covers why primer is the real difficulty driver, how to pick the right primer type and tint for your specific dark color, the prep work that protects your results, and the step-by-step application process that gets you from moody to bright without streaks, ghosting, or peeling.
Can you paint light colors over dark walls? Yes. Any dark wall can be painted a lighter color with the right primer and enough coats. The real challenge is opacity and adhesion, not the darkness of the existing color. A quality primer blocks the old color, seals the surface, and gives your topcoat a stable, uniform base to bond to.
Painting over dark walls is also one of the projects homeowners most often start themselves and then reconsider partway through, especially once they realize how many coats a saturated color actually needs. If you get partway into priming a navy accent wall and decide you would rather have it handled from here, Ace Hardware Painting Services' full home interior painting services pick up the job at any stage and finish it with premium materials and a level finish.
Quick Overview of Painting Over Dark Walls
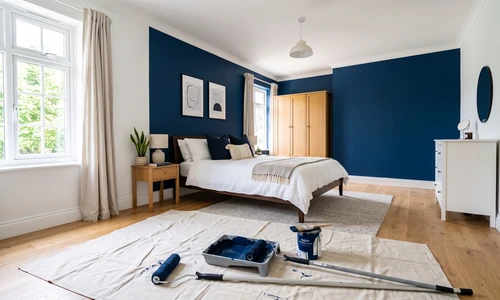
- Assess the wall: Identify the color's undertone (warm or cool), its sheen level, and how saturated it is (medium dark versus extreme dark like navy, burgundy, or black).
- Clean and repair: Remove dust and residue, fill holes, sand repairs smooth, and degloss or lightly sand any semi-gloss or satin dark surfaces.
- Select primer: Choose latex, oil-based, or shellac-based primer based on sheen and color intensity, and choose a tint (grey, warm white, or cool white) that counters the wall's undertone.
- Prime the wall: Cut in edges generously, roll with a blended technique, and apply one or two coats depending on color intensity.
- Let primer cure fully: Wait for full cure, not just dry-to-touch, before moving to paint. This varies by primer type and by humidity and temperature in the room.
- Paint the topcoat: Apply two coats of your chosen color using the same cutting-in and blending approach, checking coverage under natural light before calling it finished.
Assessing Dark Walls Before You Begin
Identifying Color Undertone and Sheen
Every dark wall color has an undertone, a secondary color mixed into the base pigment that shows up when light hits it directly or when it starts to bleed through a lighter topcoat. Warm dark colors, like burgundy, rust, or chocolate brown, carry red or orange undertones. Cool dark colors, like navy, forest green, or charcoal, carry blue or green undertones. You also need to check sheen. Run your hand over the wall or look at it under a raking light; semi-gloss and satin finishes reflect light and feel slightly slick, while flat and eggshell finishes look and feel more matte.
What Is the Hardest Wall Color to Paint Over?
The hardest wall colors to paint over combine strong undertones with a glossy finish. Navy, burgundy, and forest green saturate deeply into the wall surface, and when that pigment sits under a semi-gloss or satin sheen, the primer has to fight both the color intensity and a slicker surface that resists adhesion, which is why these combinations need extra primer coats and sometimes a deglossing step.
Pre-Work Checks and Measurements
Before buying materials, measure your wall square footage so you can calculate how much primer and paint you actually need, and check the room for humidity sources like an attached bathroom or a history of condensation on windows, since moisture in the air slows primer curing significantly. Look closely at trim lines, corners, and any texture on the wall, since these areas will need extra attention during cutting-in.
Essential Equipment and Materials for Painting Over Dark Walls
Primer Type: Latex, Oil-Based, or Shellac-Based
Latex primer is fast-drying, low-odor, and easy to clean up, and it works well for most medium-dark, flat or eggshell walls. Oil-based primer offers superior adhesion to glossy surfaces and higher opacity, which makes it a strong choice for satin or semi-gloss dark walls, though it takes longer to dry and carries a stronger odor. Shellac-based primer delivers the highest opacity and the fastest sealing of extreme colors like black or deep burgundy, plus strong mildew resistance, but it has the strongest smell and needs good ventilation. Choose latex when your timeline is tight and the wall is flat or eggshell. Choose oil-based or shellac-based when the wall is glossy or the color is extreme.
Paint Selection: Opacity, Formula, and Premium Finishes
What is the best paint to cover dark walls? The best paint for covering dark walls is a high-opacity formula built for coverage, paired with the right primer underneath. Primer choice matters more than paint choice for this task, since primer does the heavy lifting of blocking the old color; the paint itself just needs to deliver even, durable coverage on top. Premium lines like Benjamin Moore's Regal Select or Aura are formulated with dense pigment loads specifically so light colors read as true and flat rather than translucent over a primed base, which matters most in rooms with strong natural light where thin coverage shows.
Other Materials You Will Need
- Angled sash brush, 2 to 2.5 inches, for cutting in edges and trim
- Medium-nap roller (3/8 inch for smooth walls, 1/2 inch for textured walls)
- Roller extension pole for ceiling lines and tall walls
- Spackling or lightweight joint compound and sanding block for repairs
- TSP solution or a mild degreaser and sponges for cleaning
- Degloss or fine-grit sandpaper for glossy dark surfaces
- Painter's tape, drop cloths, and a paint tray with liners
- Tinted primer or a primer plus universal tint base, matched to your wall's undertone
If mapping out primer type, coat count, and drying windows for a whole-room color change starts to feel like more coordination than you want to manage, Ace Hardware Painting Services' local offices can scope the project and take it from there; you can find your local Ace Hardware Painting Services office to talk through the specifics.
Step-by-Step Dark Wall Painting Process
Step 1: Clean the Wall to Remove Dust and Contaminants
Dark walls hide dust, cooking residue, and handprints that light colors will reveal. Wipe down the entire surface with a TSP solution or mild degreaser, paying extra attention to areas near light switches, doorframes, and kitchens or bathrooms where grease and moisture build up. Rinse with clean water and let the wall dry completely before moving to repairs, since any residue left behind creates a barrier that keeps primer from bonding properly.
Step 2: Fill Holes and Sand Repairs Smooth
Fill nail holes, dents, and cracks with spackling or joint compound, and let each patch dry fully before sanding, since sanding wet filler smears it instead of smoothing it. Sand repairs flush with the surrounding wall using fine-grit sandpaper, then wipe away sanding dust with a slightly damp cloth. Full-wall sanding is not necessary for flat or eggshell dark walls; it is only needed to smooth specific repairs.
Step 3: Degloss or Sand Glossy Surfaces
Should I sand dark walls before painting them light? Sanding the entire wall is only necessary if the dark wall has a semi-gloss or satin finish. In that case, lightly sand or apply a liquid deglosser across the whole surface to scuff the sheen and give primer something to grip. Flat and eggshell dark walls skip this step entirely and go straight to priming after cleaning and repairs.
Step 4: Select and Tint Your Primer to Match Undertone
What primer color should I use when painting over dark walls? Match your primer tint to your wall's undertone: use a warm-grey or warm-white primer over warm dark colors like burgundy or rust, and a cool-grey or cool-white primer over cool dark colors like navy or forest green. This bridges the undertone gap so it does not saturate through your finish color later.
Undertone mismatches are the most common reason a repainted wall still looks faintly blue or faintly red weeks later. A pure white primer over a navy wall, for example, often lets a cool blue cast show through once the topcoat goes on, because the primer never neutralized the undertone. Tinting the primer toward a complementary grey cancels that saturation before paint ever touches the wall.
Step 5: Apply Primer with Generous Cut-In and Blended Rolling
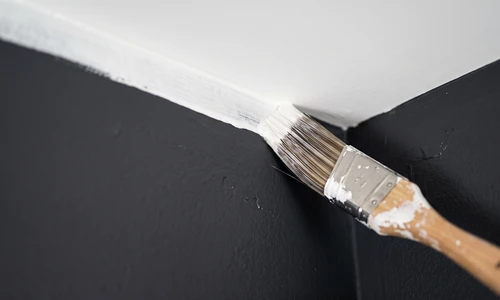
Cut in edges and trim lines first, using enough primer to fully seal the dark color right up to the corner. A too-thin cut-in is the leading cause of a visible dark halo along trim and ceiling lines once the topcoat is on, so load the brush fully and work in short, overlapping strokes. Move to the roller next, working in manageable sections and blending each new section into the wet edge of the last one to avoid lap marks, which show up more obviously over dark backgrounds than over light ones.
Step 6: Determine Whether You Need One or Two Primer Coats
How many primer coats do dark walls need before painting light colors? Medium-dark colors like forest green or charcoal typically need one primer coat followed by two paint coats. Extreme colors like navy, burgundy, or black usually need two full primer coats to fully block the color before you introduce your topcoat, and glossy dark walls may need an extra coat regardless of hue.
Step 7: Let Primer Cure Fully Before Painting
Do you need primer to paint over dark walls? Yes, primer is essential when painting light colors over dark walls. Without it, expect uneven coverage, visible brush strokes, and color bleed-through as the dark pigment reasserts itself through thin paint layers. Primer seals the surface and blocks the old color so your topcoat goes on evenly and predictably.
Latex primer generally dries to the touch in 2 to 4 hours in warm, dry conditions, but oil-based primer needs 8 hours or more, and both need longer in high humidity or a poorly ventilated room. Dry-to-touch is not the same as fully cured; painting over a primer that has not cured completely can cause bubbling or peeling later. When in doubt, give the primer an extra few hours before starting your topcoat, especially with oil-based or shellac-based formulas.
Step 8: Apply Two Coats of Topcoat with the Same Technique
Light colors have lower opacity than dark colors, so do not assume two paint coats over a primed dark wall will cover the same way two coats would over an already-white wall. Use the same generous cut-in and blended rolling technique you used for primer. Check the wall under natural daylight after the second coat; if you can still see faint shadowing where the dark color used to be, plan for a third coat rather than calling the job finished with visible unevenness.
Choosing the Right Paint for Painting Over Dark Walls
Application, Cure Window, and Aftercare
Apply each paint coat in the same section-by-section, wet-edge-blended pattern you used for primer, and allow the manufacturer's recommended dry time between coats, typically 4 hours for most latex paints under normal conditions. Full cure, when the paint reaches its maximum hardness and washability, usually takes about 2 to 4 weeks, so avoid scrubbing the wall or hanging heavy decor against it during that window. Keep the room ventilated but avoid direct drafts across a wet wall, which can cause uneven drying and visible texture differences.
Special Considerations for Challenging Dark Walls
Textured walls, wallpaper-backed drywall, and walls with old oil-based paint underneath the dark color all complicate this project. Textured surfaces trap primer unevenly in the low points, so plan for a slightly heavier first coat and a 1/2-inch nap roller to work primer into the texture fully. If you suspect an older oil-based paint layer beneath the dark color, especially in an older home, a bonding primer designed for oil-to-latex transitions prevents peeling down the road. Walls with active moisture issues, like a bathroom with poor ventilation, need the moisture problem addressed first; painting over a wall that stays consistently damp will fail no matter how good the primer is.
Rooms with vaulted ceilings, extensive built-ins, or multiple accent walls in different dark colors add enough complexity that a professional crew often saves real time. Ace Hardware Painting Services' full home interior painting crews handle the primer selection, coat counts, and technique across every room at once, so you are not troubleshooting undertone mismatches room by room.
Maintenance and Long-Term Care
Once your topcoat has fully cured, care for it the same way you would care for any interior wall, with a few extra habits worth building in since you know what is underneath. Spot-clean marks with a soft, damp cloth rather than an abrasive sponge, which can burnish a sheen difference into the wall over time. Keep an eye on high-traffic corners and light switch areas, since these spots wear first and are the most likely place a touch-up would need to match your primer and paint layers exactly.
- Dust walls periodically with a microfiber cloth or duster to prevent buildup that dulls the finish over time.
- Address moisture promptly in bathrooms or kitchens, since trapped humidity is the most common cause of paint failure over a primed dark wall.
- Keep leftover paint and primer labeled and stored for touch-ups, since color-matching a repainted dark wall later without the original formula is difficult.
- Wait for full cure before hanging shelves or artwork directly against fresh paint to avoid surface marking.
Things to Consider Before You Start
- Do you have a full weekend or more to give this? A single dark wall might take a day; a whole dark-painted room with glossy trim usually stretches across two full days once drying windows are factored in.
- Are you comfortable working with oil-based or shellac-based primer? These formulas need ventilation, longer dry times, and mineral spirits for cleanup, which is a different commitment than a quick latex project.
- Is your wall glossy, and are you prepared to degloss or sand it first? Skipping this step on a satin or semi-gloss dark wall is the fastest way to end up with peeling paint.
- Do you have a plan for undertone matching, or are you guessing on primer tint? Getting this wrong means living with a faint color cast until you repaint again.
If your honest answers point toward more time, more chemistry, and more technique than you want to take on, that is the signal to bring in a professional crew rather than push through a project that is likely to need a redo.
Why Homeowners Bring in Ace Hardware Painting Services
Painting over a deeply saturated wall is one of the projects where homeowners most often decide, partway through, that a professional finish is worth the handoff. Here is what our crews bring to that decision:
- Premium Benjamin Moore paints and stains as a standard part of every project, chosen specifically for coverage and finish quality over difficult color transitions
- Color consultation and color samples included, so undertone matching and primer tinting decisions are made correctly the first time
- A strong workmanship guarantee backing every job, so coverage and finish quality are never left to chance
- No sprayer, deglosser, or specialty primer equipment to research, rent, learn, or return once the job is done
- Background-checked professional crews working in your home with consistent, trained technique on cutting-in and blending
- A predictable weekday timeline that accounts for real primer cure windows, not rushed same-day recoating
- Cleanup included at the end of the job, so drop cloths, tape, and paint trays are not left for you to manage
- The same Ace Helpful service standard you know from the retail stores, brought directly into your home
If you would rather hand off the primer selection, undertone matching, and coat-count planning to a crew that does this daily, you can find your local Ace Hardware Painting Services office and get an estimate for your project.
Frequently Asked Questions
How hard is it to paint over dark walls?
Painting over dark walls is not inherently difficult, but it does require extra steps most light-color repaints skip. Expect one to two primer coats depending on color intensity, plus careful cutting-in and blended rolling technique. The added time and effort come from preparation and primer, not from the wall color itself.
Are dark colors hard to paint over?
Dark colors are not inherently hard to paint over; the real challenge is opacity and adhesion, not the darkness of the color itself. Proper primer selection, matched to the wall's undertone and sheen, eliminates most of the difficulty. Once primer is sealed and cured correctly, painting over dark walls behaves like any other repaint.
Do you need primer to paint over dark walls?
Yes, primer is essential when painting light colors over dark walls. Without it, expect uneven coverage and visible color bleed-through as the dark pigment shows through thin paint layers. Primer seals the old color and gives your topcoat a stable, consistent base to bond to.
What is the best paint to cover dark walls?
The best paint for covering dark walls is a high-opacity formula designed for full coverage, used together with the correct primer underneath. Primer choice matters more than paint choice for this task, since primer blocks the old color before the topcoat ever goes on. Premium formulas deliver denser, more even coverage over a properly primed surface.
What is the hardest wall color to paint over?
The hardest wall colors to paint over combine strong undertones with a glossy finish, such as navy, burgundy, or forest green in semi-gloss or satin sheen. The undertone saturates deeply into the surface while the glossy finish resists primer adhesion, requiring extra primer coats and sometimes a deglosser step to fully block and seal the color.
How much does primer and paint cost for a dark wall repaint?
Material costs vary by room size and primer type, but a typical bedroom-sized wall repaint usually runs between 40 and 120 dollars in primer and another 40 to 100 dollars in paint, depending on whether you need one or two primer coats and which paint formula you choose. Glossy or extreme dark colors that need shellac-based primer or extra coats will land toward the higher end of that range.