
How Do You Paint Siding Without Streaks?
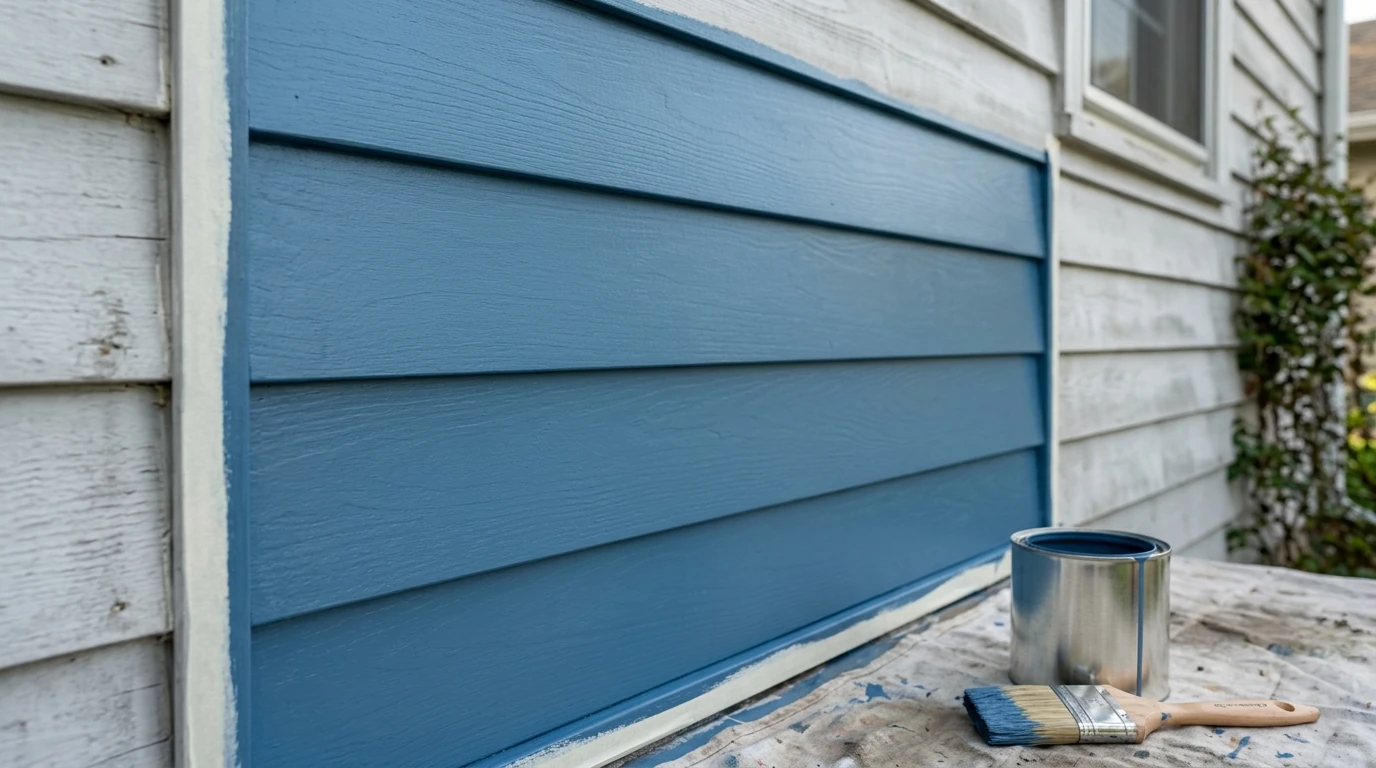
If you want to know how to paint siding without streaks, the honest answer is that it comes down to three things - a clean surface, the right roller for your siding, and keeping a wet edge as you work. Homeowners in Lenexa, KS run into this problem more often than you might expect. You finish a wall, step back, and see lap marks running across the whole thing. The good news is that streaks are almost always preventable, and most of the fixes are simpler than they look.
Understanding What Causes Paint Streaks on Siding
Streaks happen when paint starts drying before you can blend it into the section next to it. That visible line where two passes meet at different stages of drying is what painters call a lap mark. Once it sets, it is hard to fix without sanding and recoating.
Paint that is too thick drags and leaves ridges. Paint that has been thinned unevenly spreads in inconsistent layers. Both situations make streak-free siding paint much harder to achieve, even with good technique.
Here are the most common root causes worth knowing before you start:
- Painting over a dirty, chalky, or mildewy surface that keeps the paint from bonding evenly.
- Using a roller nap that does not match the texture of your siding.
- Working in temperatures above 90 degrees Fahrenheit, which shortens the time you have to blend each section.
- Letting too much time pass between adjacent sections so the wet edge dries before you can work into it.
- Loading the brush or roller unevenly, which creates thick-to-thin transitions across a single pass.
The Right Tools Make a Real Difference
Before you open the can, make sure you have the right setup. For most siding projects you will need a roller, an angled brush for trim and edges, painter's tape, drop cloths, a paint tray, and a way to clean the surface before you start. The roller handles the large flat sections, and the brush takes care of corners and spots the roller cannot reach cleanly.
Give the paint a thorough stir and check the consistency. If it strings off the stir stick in thick ropes, let it sit at room temperature for a bit before you start. Do not add water to latex siding paint unless the label specifically says you can.
Choosing the Right Roller Nap for Your Siding Type
Roller nap thickness controls how much paint the roller holds and how evenly it releases onto the surface. Getting this wrong is one of the most reliable ways to end up with lap marks.
- Smooth vinyl siding: a 3/8-inch nap roller deposits a thin, even film without leaving texture or lint marks.
- Lightly textured or wood lap siding: a 1/2-inch nap roller reaches into shallow grooves without overloading the surface.
- Rough or heavily textured siding, including stucco-profile panels: a 3/4-inch nap roller fills the surface profile and avoids skipping across high spots.
A 2.5-to-3-inch angled brush handles trim, corners, and the channels between siding courses. Cut in with the brush first along the painter's tape, then follow immediately with the roller while that brushed section is still wet. This keeps the wet edge alive and prevents a visible line where brush work meets roller work.
Getting the Surface Ready
No amount of good technique fixes a poorly prepared surface. Paint applied over dirt, mildew, or chalking will streak and peel regardless of how carefully you roll it. Start with a thorough wash using a TSP solution or TSP substitute mixed to label directions. Work the solution onto the surface with a scrub brush, moving from the bottom up so dirty water does not run down across sections you already cleaned. Then rinse from the top down.
A pressure washer speeds up the rinsing on larger surfaces. Keep the nozzle at least 12 inches away and use a wide-angle tip so you are not driving water behind the panels. After washing, let the siding dry for at least 24 hours before you apply anything. Moisture trapped under the film causes adhesion failures and uneven sheen that look a lot like streaking.
Walk the surface and check for cracked caulk, gaps at trim joints, or spots where the existing finish has peeled. Fill small voids with exterior spackle, let it cure, then spot-prime any bare wood or repaired areas with a bonding primer. Bare spots absorb paint differently than the surrounding surface, and that difference shows up as a visible patch in the finished coat. If you want a professional eye on your siding's condition before committing to a full repaint, the vinyl siding painting service can walk you through what your surface actually needs.
Optimal Weather Conditions for Streak-Free Application
Temperature, humidity, and wind all affect how paint flows, levels, and dries on your siding. Paint outside the right window and you can do everything else correctly and still end up with streaks.
For most exterior latex paints, aim for air temperatures between 50 and 85 degrees Fahrenheit. Below 50 degrees, latex paint thickens and does not level out, leaving brush and roller texture frozen in the dried film. Above 85 degrees, especially in direct sun, the surface of the paint skins over before the coat beneath has had time to flow and blend.
Relative humidity between 40 and 70 percent gives the paint enough open time to blend without letting it stay wet so long that dust settles into it. High humidity above 85 percent can cause paint to run or sag on vertical surfaces. Wind above 15 miles per hour dries the leading edge of each roller pass too fast and cuts down the time you have to maintain a wet edge.
Paint in the shade when you can and follow the shade around the house as the day moves. Morning hours are usually the most reliable window. Avoid applying paint if rain is forecast within 24 hours.
Step-by-Step Application to Avoid Streaks
Work from the top of the wall down to the bottom. Any drips fall onto unpainted surface, and you can keep your eye on the section you just completed while it is still fresh enough to fix.
Load the roller evenly by rolling it back and forth in the tray until the nap is saturated but not dripping. Apply paint across a 3-to-4-foot section using a W or M pattern, then smooth it with light, straight passes that follow the direction of the siding. Do not lift the roller sharply at the end of a stroke. Feather it off the surface gradually so you are not leaving a visible edge behind.
Proper Overlap Patterns and Blend Techniques
Keeping a wet edge is the most important habit in streak-free painting. It means the paint at the edge of your current section is still workable when you move into the next one. If that edge dries first, you are painting over a set film and a lap mark is almost guaranteed.
Work in sections you can finish in two to three minutes. Overlap each new roller pass by 3 to 4 inches into the previous wet section using light pressure. That overlap zone merges the two passes into one continuous film instead of two layers with a visible seam between them. On long horizontal siding runs, complete the full width of one siding course before moving down to the next. This keeps the wet edge running horizontally and prevents the vertical lap marks that show up when you stop in the middle of a wall and restart.
Where brushed edges meet rolled sections, make one final light roller pass that extends slightly into the brushed zone while both areas are still wet. That blending pass makes the transition invisible once the coat dries.
Troubleshooting Streaks During Application
If you spot a lap mark or ridge forming while the paint is still wet, act right away. A streak caught within two to three minutes can usually be fixed by loading a clean roller lightly and rolling over the area with very light pressure, feathering the edges outward. Do not press hard. Extra pressure pushes the thickened edge deeper into the film instead of smoothing it out.
If the streak has started to set (it has lost its gloss but is still soft), leave it alone. Adding more paint to a partially cured lap mark builds uneven thickness and makes the streak more visible once dry. Let the coat cure fully, sand the raised edge lightly with 220-grit sandpaper, and apply the second coat using the wet-edge technique.
Thin lines that look different from lap marks usually come from a dirty or contaminated brush. Stop, clean the brush with water, and check the tray for debris before continuing. A contaminated tray puts particles onto every roller load that follows.
When streaking appears uniformly across large sections rather than at transition points, the paint is likely too thick or the temperature is too high for the product. Move to a shaded section of the wall while conditions improve and check the application temperature range on the can. If the full home exterior painting scope has grown beyond what one weekend can handle cleanly, bringing in a crew to finish the project is a perfectly reasonable call.
Second Coat Application for Streak Elimination
A properly applied second coat can take care of minor streaking and lap marks left by the first. The key is waiting long enough and checking the surface before you start. Most exterior latex paints need a minimum of four hours before recoating, but 24 hours is the safer window. Applying the second coat too soon traps moisture in the film and can actually make streaking worse.
Before the second coat goes on, run your hand across the first coat and look for raised edges from dried lap marks. Sand those lightly with 220-grit sandpaper and wipe away the dust with a dry cloth. A second coat rolled over an unsanded ridge just adds another layer on top of the bump. It will not hide it.
Apply the second coat using the same wet-edge and overlap technique you used for the first. Two thinner coats applied with consistent technique will always outperform one heavy coat, both for streak prevention and for how long the finish holds up.
Common Mistakes That Lead to Streaking
Most siding streaks come from a short list of repeatable errors. Knowing them ahead of time makes them easy to avoid.
- Skipping surface cleaning. Painting over dirt or mildew causes adhesion failures that show up as uneven sheen and streaking within the first season.
- Painting in direct midday sun. The surface of the siding can run 20 degrees hotter than the air temperature, which cuts your open time dramatically.
- Using the wrong nap. A 3/4-inch nap on smooth vinyl siding leaves visible texture lines that dry as streaks.
- Overloading the brush or roller. Excess paint bunches at the edges of each pass and dries as a raised ridge.
- Stopping mid-wall for a break. Resuming after the wet edge has dried is the most common cause of hard lap marks on large siding panels.
- Applying one heavy coat instead of two thinner coats. Thick single coats sag, run, and show every texture difference in the siding surface.
- Leaving painter's tape on too long. Tape left past full cure can pull the paint film when removed and leave a ragged transition line at the edge.
A thorough surface cleaning before any paint touches the wall eliminates the contamination category of mistakes entirely. The power washing service removes chalking, mildew, and oxidation so the finish coat bonds evenly across the whole surface.
Why Choose Westlake Ace Hardware Painting Services Kansas City Metro
We know that starting an exterior siding project can feel like a lot, especially when you want the result to actually look good. Westlake Ace Hardware Painting Services Kansas City Metro works with homeowners in Lenexa, KS and the surrounding area to make that process as straightforward as possible. Every residential exterior project uses Benjamin Moore paints as the standard, which means you are getting a product formulated for adhesion, coverage, and color that holds up season after season. We include color consultation and physical color samples with every residential project so you can see the finish in natural light before anything goes on the wall. Our background-checked W-2 crews follow the same preparation and wet-edge techniques covered above, and all work is backed by a workmanship guarantee. If you are trying to decide whether to take this on yourself or hand it off, we are happy to walk you through what the scope looks like before you make any decision. Get an Estimate from your local Westlake Ace Hardware Painting Services team.
FAQ
What is the most suitable way to avoid lap marks on horizontal siding?
Work the full length of one siding course before moving down to the next. That way your wet edge runs horizontally and each new section blends into paint that is still workable. Stopping in the middle of a course is the most common reason lap marks show up on horizontal siding profiles.
How long should I wait between coats on exterior siding?
Most exterior latex paints ask for a minimum of four hours between coats, but waiting a full 24 hours is usually the safer choice. Applying the second coat before the first has fully cured traps moisture in the film, which can cause soft spots, uneven sheen, and streaks that are hard to fix after the fact.
Can you use a sprayer to paint siding without streaks?
Yes, but spraying alone is not enough. You need to back-roll immediately after spraying each section, meaning you follow the sprayer with a roller to work the paint into the surface. Spraying without back-rolling leaves a surface texture that catches light differently and can look streaked in certain conditions. Consistent distance and speed with the sprayer also matter to avoid heavy and light spots across each pass.
What is the downside of painting vinyl siding?
Painting vinyl siding can void the manufacturer's warranty on the panels, especially if you choose a color darker than the original factory finish. Darker colors absorb more heat, which puts stress on the panels. Using a paint specifically formulated for vinyl siding and staying close to the original color's light-reflectance value takes care of both concerns.
How do painters get a straight edge along trim and windows?
It starts with painter's tape pressed firmly to a clean, dry surface with a putty knife or your fingernail along the full edge to prevent bleed. Then cut in with a 2.5-inch angled brush, drawing the tip along the tape edge in a single steady stroke with a loaded but not dripping brush. Pull the tape off while the paint is still slightly wet, angling it back at 45 degrees away from the painted surface so it does not pull the edge of the film with it.