
Should I Paint Inside My Cabinets?
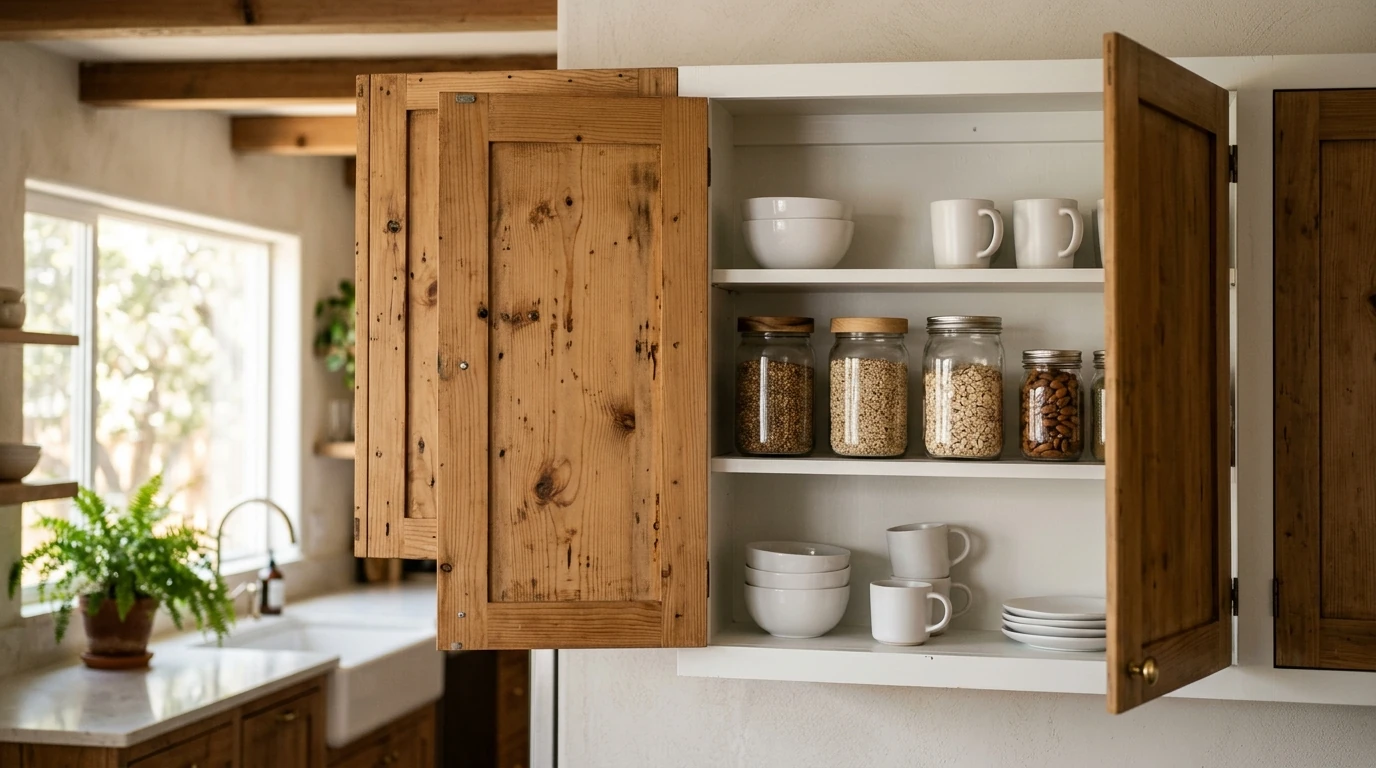
For most kitchens, the answer to whether you should paint inside your cabinets is yes - and it is often one of the most satisfying parts of a cabinet refresh. Homeowners in Austin, TX regularly ask this question when they are repainting cabinets, dealing with stained or worn interiors, or simply noticing that the inside of their cabinets does not match the clean exterior they just updated. The cases where it makes the most sense are pretty clear, and so are the cases where you can reasonably skip it. Here is what actually drives that decision.
When Painting Cabinet Interiors Makes Sense
If your cabinets have glass doors or open shelving, painting the interior is not really optional - that interior is on display every time someone walks through your kitchen. Raw wood, yellowed laminate, or a factory finish that has seen better days will pull down the look of the whole room no matter how good the cabinet exteriors look.
If you are already repainting the cabinet exteriors, doing the interiors at the same time just makes sense. You get a cohesive, finished result instead of a sharp new exterior color meeting a dated or bare box inside. It is also a natural time to do it since the cabinets are already emptied and prepped.
Two more situations where inside cabinet painting pays off clearly:
- Cabinet boxes with visible grease absorption, water staining, or discoloration from age. Paint seals those surfaces and makes them far easier to clean going forward.
- Kitchens where the cabinet structure is solid but the overall look feels dated. Painting the full unit, interior included, gives you a refreshed kitchen without the cost of replacement.
Where you can reasonably skip it: solid opaque-door cabinets in good condition where the interior is never seen and the surface is clean and intact. The decision really comes down to visibility, condition, and the scope of what you are already doing.
Key Benefits of Painting Cabinet Interiors
Beyond appearance, painted cabinet interiors do some real practical work. A sealed surface resists moisture - and in a kitchen where steam and temperature shifts happen daily, that protection matters for both wood and laminate cabinet boxes. It also makes the interior genuinely easier to keep clean. Wiping down a painted shelf takes seconds. Wiping down raw wood or peeling shelf paper is a different experience entirely.
- Moisture protection slows absorption from steam, spills, and humidity cycles.
- Painted surfaces resist staining from oils, food contact, and everyday cleaning products.
- A painted interior creates visual depth when cabinet doors are open, making the kitchen feel more finished.
- Sealed interiors support better adhesion for shelf liners, so liners stay put instead of curling at the edges.
- Fresh cabinet interiors make a noticeable impression during home showings - buyers open cabinets.
If you are ready to move forward and want a professional finish on the full project, our cabinet painting service covers both interior and exterior surfaces with the prep steps that make the result last.
What to Know About Your Cabinet Material
The material your cabinet boxes are made from changes how you prep them, what primer you need, and how long the finish will hold up. Getting this part right is where most DIY cabinet paint jobs succeed or fail.
Wood cabinets are the most forgiving surface to work with. Light sanding with 150-grit paper opens the grain so primer can bond properly. On oak, pine, or cherry interiors, a stain-blocking oil-based primer - shellac-based products like Zinsser BIN are a reliable choice - prevents tannin bleed-through that can yellow a water-based topcoat. After priming, a water-based alkyd or 100-percent acrylic paint in satin or semi-gloss gives you the durability and cleanability that cabinet interiors need. Two thin coats hold up better than one thick one.
Laminate cabinets need a bonding primer made specifically for slick, non-porous surfaces. Standard primers simply will not stick reliably to factory laminate, and you will know it within a year when the paint starts peeling at the edges. A product like Zinsser Bulls Eye 1-2-3 or a dedicated bonding primer gives the topcoat something to grip. Light scuff sanding with 220-grit before priming helps even more. Once the bonding primer is cured, a semi-gloss water-based alkyd topcoat performs well. Laminate does wear a little faster than wood at contact points like shelf edges, so plan for some touch-up work after a few years of regular use.
If you are not sure what material your cabinet boxes are made from, or you are working with a mix of materials, a color consultation is a good way to sort through finish and product selection before you buy anything.
Choosing the Right Paint and Color
For cabinet interiors, the finish matters as much as the color. Semi-gloss and satin are the two finishes that make sense here. Semi-gloss handles moisture and staining better and reflects light into the cabinet box, which is genuinely useful in deep or poorly lit cabinets. Satin looks a little softer, hides minor surface texture better, and is a solid choice for pantries, bathroom vanities, and lower-traffic interiors where moisture is less of a factor.
On color, most homeowners go with white or off-white because it keeps the inside bright, reads clean, and works with almost any exterior cabinet color. If your cabinets have glass doors or open shelving, a contrasting interior color - a warm gray inside white cabinets, for example - creates intentional visual depth and can look really intentional when it is done well. The key is choosing the interior color in relation to your exterior cabinet finish, not in isolation.
- Semi-gloss is the practical choice for kitchen cabinets with regular moisture and cleaning exposure.
- Satin works well in pantries, bathroom vanities, and lower-traffic cabinet interiors.
- Light interior colors make shelves feel larger and make it easier to find what you are looking for.
- Contrasting interior colors works strongest when the cabinet style has visible interior space - glass doors or open shelving.
- Always select interior color alongside the exterior finish, not as a separate decision.
How to Paint Cabinet Interiors: The Process
Prep and Cleaning
Good prep is what separates a finish that lasts ten years from one that starts peeling in two. Start by emptying the cabinets and removing the shelves. Clean every interior surface with a degreasing solution - a TSP substitute works well - to cut through cooking oils and residue that would prevent primer from bonding. Let everything dry fully before you touch sandpaper.
For wood interiors, sand with 150-grit and wipe down with a tack cloth to remove dust. For laminate, a light scuff with 220-grit is all you need. Mask off any hardware tracks, hinges, or interior fixtures before priming. Keep the space ventilated while you work - open windows and run a fan to move air through, especially if you are using a shellac-based primer, which has a stronger solvent smell. The Painting Contractors Association recommends at least two air changes per hour during interior painting in enclosed spaces.
Primer and Topcoat Application
Apply primer with a short-nap roller on flat surfaces and a synthetic bristle brush in corners and along edges. Oil-based stain-blocking primers need about 24 hours to cure before you topcoat. Water-based bonding primers dry faster - usually two to four hours - but they benefit from a full overnight cure before you lightly sand with 220-grit and move to your topcoat. That light sanding step between primer and paint is worth doing. It knocks down any raised grain or brush marks and makes the final coat noticeably smoother.
Apply two finish coats, giving the manufacturer's recommended dry time between them. Most water-based alkyds and acrylics need two to four hours between coats. Wait at least 24 hours before putting items back on the shelves. Full hardness cure takes anywhere from seven to thirty days, so go easy on heavy items for the first week after the final coat.
When the full cabinet project includes doors, boxes, and frames together, a systematic approach makes a real difference in the final result. Our kitchen interior painting service handles the complete prep and application process for homeowners who want a consistent, durable finish across the whole kitchen.
Keeping Painted Cabinet Interiors Looking Good
Once the paint is cured, maintenance is pretty simple. Wipe shelves with a damp microfiber cloth in high-use areas. Skip the abrasive sponges - they scuff semi-gloss and satin finishes over time. For stuck-on residue, mild dish soap on a soft cloth does the job. Avoid cleaners with bleach or ammonia on painted surfaces, as they break down the sheen faster than regular wear does.
With proper prep and the right products, painted cabinet interiors on wood surfaces typically hold up five to eight years before shelf edges and contact points show meaningful wear. A 2023 Architectural Coatings Industry durability study found that water-based alkyd formulations on properly primed wood surfaces maintained adhesion and sheen at the seven-year mark at a significantly higher rate than standard acrylic latex applied without stain-blocking primer. When touch-up time comes, lightly sand the worn area with 220-grit, apply one thin coat of the original topcoat, and feather the edges. It blends well if the original paint has not shifted much in sheen from cleaning over the years.
DIY or Professional: How to Decide
DIY cabinet interior painting is a reasonable weekend project when the cabinet boxes are in good shape, the material is wood with consistent surfaces, and you have done surface preparation work before. Material costs for a standard 10-cabinet kitchen - primer, sandpaper, degreaser, brushes, roller, and topcoat paint - typically run to about one quart of primer and one quart to one gallon of topcoat. Time-wise, plan for eight to twelve hours spread across two to three days once you factor in proper dry times between coats.
Where DIY gets harder: laminate cabinets that need the correct bonding primer to avoid peeling, larger kitchens where keeping a consistent finish across many surfaces is difficult without spray equipment, and projects where the exterior cabinet repaint is also in scope. Professional application on a full cabinet set produces a more uniform result because of spray-applied finish options and systematic surface preparation that is tough to replicate with brush and roller on an entire kitchen.
Common Mistakes to Avoid When Painting Cabinet Interiors
Most cabinet interior paint failures come down to a handful of consistent errors. Avoiding these will save you from redoing the work.
- Skipping degreaser before sanding. Sanding over cooking grease embeds contamination into the wood and causes adhesion failure under the primer layer.
- Using the wrong primer for the substrate. Standard drywall primer on laminate will peel within months under normal use.
- Topcoating before primer is fully cured. Trapping solvent under a film layer causes bubbling and adhesion loss.
- Applying one heavy coat instead of two thin ones. Thick single coats sag, take longer to cure, and do not harden as fully.
- Painting without ventilation. Poor airflow slows cure time, extends off-gassing, and creates solvent concentration that is a real concern with shellac-based primers.
- Using a flat or eggshell finish inside a cabinet. These finishes mark easily and do not clean well at daily contact points.
Why Choose Ace Hardware Painting Services North Austin
A cabinet painting project involves a lot of small decisions - primer type, finish selection, color coordination, prep sequence - and it helps to have someone who has worked through all of them before. Ace Hardware Painting Services North Austin uses Benjamin Moore paints and primers as the standard on residential projects, which means the topcoat performance and color accuracy are consistent and reliable. Every residential project includes color consultation and physical color samples so you can see how your interior cabinet color reads in your actual kitchen light before anything gets painted. Our crews are W-2 employees who are background-checked, so you know who is working in your home. A workmanship guarantee covers the finished result - if something falls short of what the project requires, we make it right. Whether you have a single set of glass-door cabinets in Austin, TX or a full kitchen refresh in scope, Get an Estimate from our North Austin office and we will help you figure out the right path forward.
FAQ
Is it worth painting the inside of cabinets?
Yes, in most cases it is worth doing. Painted cabinet interiors protect against moisture and staining, make shelves much easier to wipe clean, and give the kitchen a finished look when the doors are open. The payoff is highest on glass-door cabinets, open shelving, and any interior that is visibly worn or discolored. Solid-door cabinets in good condition are the lowest priority, though a painted interior still helps in kitchens where humidity and steam are regular.
What is the 1-3 rule for cabinets?
The 1-3 rule is a design proportion guideline that suggests roughly one third of visible cabinet shelf space should carry intentional or decorative items, with two thirds staying functional and organized. For painting purposes, it reinforces why interior color matters on open or glass-door cabinets. A cohesive interior color makes the organized portion read as intentional rather than just full.
How long does paint last inside kitchen cabinets?
With proper prep and the right products, interior cabinet paint on wood typically lasts five to eight years before contact points show meaningful wear. Shelf edges and front spans wear first. Using a stain-blocking primer on wood or a bonding primer on laminate, combined with two thin topcoats and full cure time, puts the finish at the longer end of that range.
Can you paint over existing cabinet interior finishes?
Yes, as long as the existing finish is intact and well-adhered. Scuff sand with 220-grit, apply the right primer for your substrate, and topcoat as usual. If the existing finish is peeling or soft, remove it fully before priming. Painting over a compromised base layer transfers the adhesion problem to your new coat and it will fail the same way within months.
Do bathroom cabinets need different paint than kitchen cabinets?
The prep and finish approach is similar, but bathroom vanity interiors deal with higher sustained humidity than kitchen cabinets do. A semi-gloss finish with a mildewcide or a paint formulated with mold resistance is the right call for bathroom interiors. The key difference is prioritizing the most moisture-resistant option in whichever product line you are using, since condensation and humidity in a bathroom are more constant than in a kitchen.