
How Much Does Cabinet Painting Cost in Austin, TX?
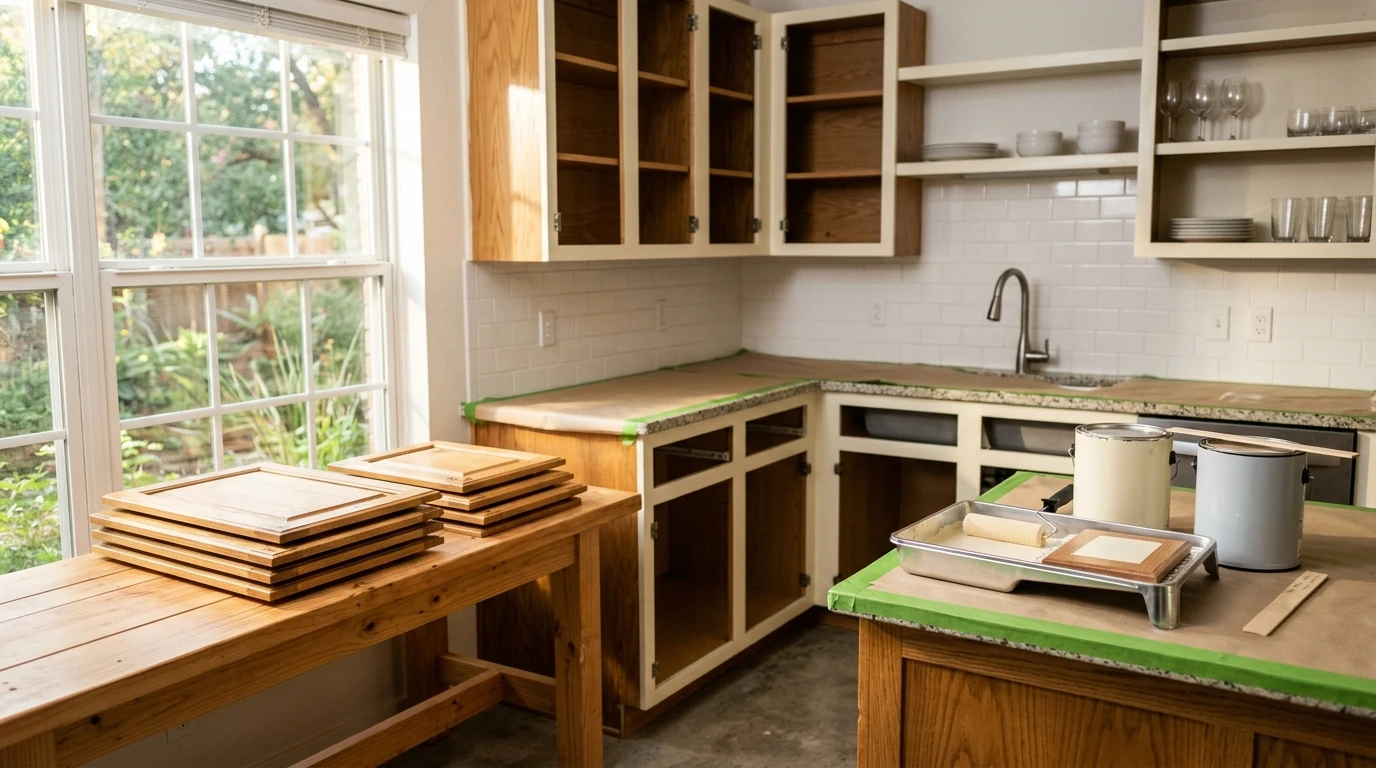
Cabinet painting cost in Austin, TX depends on a handful of real factors: how many doors your kitchen has, what condition the cabinets are in, what wood species you are working with, and how the finish gets applied. Homeowners across Austin, TX are choosing cabinet refinishing over full replacement because it delivers a genuinely fresh kitchen without tearing everything out. A standard kitchen with 20 to 30 cabinet doors can range from a modest material spend on a DIY project to several thousand dollars for a professionally sprayed finish with thorough prep. Knowing what pushes that number up or down helps you read any quote with confidence and set realistic expectations before work begins.
What Drives Cabinet Painting Costs
No two kitchens are the same, so any flat per-door figure is a starting point rather than a firm number. Here are the factors that move the needle most.
- Door count and kitchen size are the biggest drivers. More doors mean more time for removal, prep, painting, and reinstallation.
- Cabinet condition matters a lot. Heavy grease buildup, old latex paint, or a previous DIY finish all require extra degreasing, sanding, or stripping before primer will stick properly.
- Wood species affects how much prep is needed. Open-grain woods like oak need grain filler before a smooth finish is achievable. Maple and pine each accept paint differently and call for different primer choices.
- Application method shapes both the timeline and the finished look. Spray painting produces a factory-smooth result but requires full door removal and a clean spray environment. Brush-and-roll is faster to set up but leaves more visible texture.
- Paint and primer quality changes the material portion of the quote. Waterborne alkyd formulas from Benjamin Moore and Sherwin-Williams cost more per gallon than standard latex but cure to a harder finish that holds up in a kitchen.
- Hardware removal and reinstallation, including hinges and pulls, adds labor time and is often a separate line item on a professional estimate.
Homes in established neighborhoods across Austin tend to have older cabinet stock with years of cooking grease worked into the surfaces. That degreasing and sanding phase simply takes longer than it does on newer cabinetry in recently built subdivisions on the north edge of the city. It is worth asking any crew you interview how they handle that prep step specifically.
Understanding Cabinet Painting Value
Painting your cabinets is one of the higher-return kitchen updates you can make. Full cabinet replacement, including new boxes, doors, hardware, and installation, routinely costs several times more than a professional repaint of the cabinets you already have. And if the cabinet boxes are structurally solid, there is no good reason to replace them.
Painted cabinets also affect how buyers perceive a kitchen during a home sale. Real estate professionals consistently point to kitchen condition as something that influences offers, and updated cabinetry is among the first things a buyer notices. A professionally applied finish with a durable topcoat holds up to daily use for many years when properly maintained, so the value shows up both at resale and in how you feel about your kitchen every day.
The disruption comparison matters too. Cabinet replacement means removing existing boxes, potential drywall patching, and a multi-week project. A professional cabinet painting project typically gets your kitchen back to full use within a few days.
- Repainting costs a fraction of full replacement while delivering a result that reads as new.
- Structurally sound cabinet boxes stay in place, no demolition required.
- Kitchen downtime is days, not weeks.
- A quality finish applied over the right primer can last a decade or more with routine cleaning.
Professional Cabinet Painting: How the Process Works
The quality of a painted cabinet finish is almost entirely determined by how thorough the preparation phase is. That is where professional results part ways from DIY attempts that start peeling within a year.
Surface Preparation Techniques
Preparation starts with a full degreasing of every cabinet surface. Kitchen cabinets collect airborne grease over years of cooking, and that film stops primer and paint from bonding the way they should. After degreasing, surfaces get sanded to remove gloss and give the primer something to grab onto.
The sanding approach varies by wood type. Heavily grained cabinets need more aggressive scuff-sanding or a grain filler to level the surface before primer goes on. Cabinets with a previous oil-based finish need a different primer than those with existing latex paint. Mixing incompatible primer choices is one of the most common reasons paint adhesion fails over time. All hardware, hinges, and cabinet doors come off before any work begins so every surface gets consistent coverage.
Texas heat is worth noting here. Surfaces that are warm to the touch can cause certain primers to flash too quickly, which affects how the film builds. Scheduling prep work during cooler parts of the day, or making sure indoor temperatures stay consistent, helps avoid that.
Paint Application Methods
Spray application gives you the smoothest, most factory-consistent finish on cabinet doors and drawer fronts. Doors are removed, laid flat in a clean area, and sprayed in several light coats with enough time between each coat for the film to set. Cabinet frames that stay in place are sprayed or brushed depending on access. The spray environment needs to be clean because dust settling into wet paint shows up in the final finish.
Brush-and-roll is a legitimate approach when spray is not practical because of space or occupancy. It does require a quality brush, good technique, and sometimes a light sand between coats to smooth any texture before the final coat goes on. Waterborne alkyd paints level out better than standard latex, which helps minimize brush marks in the finished surface.
Selecting the Right Paint for Your Cabinets
Paint choice is one of the most important decisions in a cabinet project. Cabinets get touched, wiped down, and steamed constantly. Standard wall paint is not built for that, and it will start to fail within a year or two in a kitchen environment. What you want is a paint formulated to cure to a hard, scrub-resistant film.
Waterborne alkyd paints, sometimes called alkyd-hybrid enamels, give you the easy cleanup of a water-based product with a cure that produces a hard, durable finish similar to traditional oil-based paint. Formulas from Benjamin Moore and Sherwin-Williams in this category resist chipping, moisture, and yellowing better than conventional latex. A dedicated cabinet or trim primer applied before the topcoat improves adhesion on any wood species and is especially important on woods with natural tannins, which can bleed through lighter topcoat colors if the primer is not matched correctly.
Texas humidity, while lower than coastal climates, still works its way into kitchens through cooking steam and dishwasher cycles. A fully cured waterborne alkyd finish handles that moisture cycling better than latex, which stays somewhat permeable even after it has dried to the touch.
Sheen level affects both durability and how the surface looks. Higher-sheen finishes wipe clean more easily but show every surface imperfection. Satin or semi-gloss is the standard recommendation for cabinets because it balances cleanability with a forgiving appearance on real-world cabinet surfaces.
Cabinet Condition and What It Means for Your Project
Not every cabinet set is an equal candidate for painting. Checking condition before you start tells you whether extra prep steps are needed and whether painting makes sense relative to how much life the cabinets have left.
Cabinets with solid wood or MDF doors, intact face frames, and no structural damage are straightforward candidates for painting. Cabinets with delaminating thermofoil, swollen MDF edges from prolonged moisture exposure, or cracked corner joints need repair work first. In some cases the damage affects how well the finished paint holds over time, and it is better to know that upfront.
A few scenarios that call for extra prep include cabinets previously painted with a glossy oil-based enamel, which needs thorough scuff-sanding or a bonding primer to accept a new topcoat. Cabinets with a heavy stain and topcoat need a shellac-based or high-adhesion primer to keep the old finish from bleeding through. Older homes near downtown Austin frequently have original wood cabinetry that has been painted several times over the decades, and those layers need to be checked for stability before adding another coat on top.
Project Timeline Expectations
A professional cabinet painting project for a standard kitchen typically runs two to four working days from start to hardware reinstallation. That covers door removal, surface preparation, primer, two or more topcoats with appropriate drying time between each, and putting everything back in place.
Larger kitchens with more than 30 doors, or projects that need grain filling or surface repair, take a bit longer. Most professional crews handle cabinet doors off-site or in a designated clean area of the home to keep the work environment controlled and minimize disruption. You should plan for limited kitchen access during the project and allow a full cure period of several days after reinstallation before the cabinets go back to heavy daily use.
Austin, TX summers add one variable worth planning around. High ambient temperatures can shorten the working window for wet paint, so crews often shift to early morning starts during peak heat months to get adequate application time before afternoon temperatures climb.
Choosing Austin Cabinet Painters
When you are evaluating Austin cabinet painters, the questions that matter most are about process and accountability. A credible crew will explain exactly how they handle surface preparation, what primer system they use, which topcoat product they apply, and what the cure timeline looks like. Vague answers to those questions are a signal that the prep phase might get shortened.
It also matters who is actually working in your home. Crews that are background-checked and employed directly by the company provide more consistent oversight and workmanship than per-project subcontract arrangements. Ask whether the quote includes a written workmanship guarantee and what happens if touch-up work is needed after the project closes.
Color selection is worth factoring into the conversation too. Homes throughout the Austin area vary widely in lighting conditions, and a color that looks great on a paint chip can read differently under the warm incandescent light common in older kitchen fixtures or the bright natural light in south-facing kitchens in newer subdivisions on the south side of the city. Physical paint samples applied to your actual cabinet surfaces before committing to a color take most of the guesswork out of that decision. A color consultation is a straightforward way to feel confident in your choice before any painting begins.
Maintaining Your Painted Cabinets
A well-applied professional finish holds up to years of daily kitchen life, but a little routine care goes a long way toward keeping it looking great. The most common cause of early paint failure on kitchen cabinets is moisture sitting at the seams around the sink cabinet and near the dishwasher. Wiping those areas down regularly and addressing any plumbing drips when they happen prevents the moisture cycling that causes paint to bubble and lift at the edges.
For routine cleaning, mild soap and water on a soft cloth is all you need. Abrasive cleaners, scrubbing pads, and solvent-based products damage the topcoat over time and are worth avoiding. Grease that builds up around the cabinet faces near the range is easier to remove when you catch it early rather than letting it bake on over weeks.
Small chips or scratches can usually be touched up with a fine brush and the original topcoat paint applied directly to the spot. Larger areas of peeling or delamination, especially in the moisture-prone zones near the sink, are worth having a professional assess to see whether the surface underneath needs attention before recoating.
Why Choose Ace Hardware Painting Services North Austin
A cabinet painting project can feel like a lot to navigate, and Ace Hardware Painting Services North Austin is here to make the whole process easier for you. Every project is built on Benjamin Moore product standards, with primer matched to your specific cabinet material and existing finish, and topcoats selected for the hard-cure performance a kitchen demands. Color consultation and physical paint samples are included on residential projects, so you can see exactly how your color choice looks on your actual cabinets before we paint a single door. Our crews are background-checked W-2 employees, which means you know who is in your home and there is real accountability from start to finish. The workmanship guarantee means that if something is not right after the project closes, we come back and make it right. When you are ready to move forward with a cabinet refresh, Get an Estimate from Ace Hardware Painting Services North Austin.
FAQ
How much does it typically cost to have kitchen cabinets professionally painted in Austin, TX?
The cost in Austin, TX varies based on how many doors your kitchen has, the condition of the surfaces, and the application method the crew uses. A small kitchen with 15 to 20 doors will generally run less than a large kitchen with 30 or more doors and a more complex layout. Extra prep steps like degreasing, grain filling, or repairing prior finish damage add to the total. An in-person assessment gives you a much more accurate number than any general per-door estimate.
Is painting kitchen cabinets worth it compared to replacing them?
For cabinets that are structurally solid with intact doors and frames, professional painting delivers a result that looks like new at a fraction of the replacement cost. Your kitchen is also back in service within days rather than weeks. Replacement makes more sense when the boxes themselves are damaged, hinges are failing, or you need a different layout entirely.
How long does a professional cabinet painting project take from start to finish?
Most standard kitchen projects run two to four working days, covering door removal, surface preparation, primer, two or more topcoats, and hardware reinstallation. Larger kitchens or surfaces that need extra prep work will take a bit longer. Plan for limited kitchen access during the project and allow a few days of cure time after reinstallation before things go back to normal use.
What type of paint holds up strongest on kitchen cabinets?
Waterborne alkyd enamel formulas are the professional standard for cabinet surfaces because they cure to a hard, scrub-resistant film that handles daily contact and moisture better than standard latex wall paint. Brands like Benjamin Moore and Sherwin-Williams make products specifically formulated for high-contact surfaces like cabinets and trim. The right primer matched to your cabinet's existing finish and wood species is just as important as the topcoat for long-term results.
What cabinet conditions require extra preparation work before painting?
Cabinets with heavy grease buildup, previous oil-based enamel finishes, open-grain wood species like oak, or unstable prior paint layers all need additional prep steps before painting begins. Delaminating surfaces, moisture-swollen MDF edges, and woods with natural tannins that can bleed through lighter colors also need specific primer treatments. Taking the time to assess condition thoroughly before any painting starts is what separates a finish that lasts for years from one that starts failing within months.